
Card Holder Tutorial
>> Monday, December 22, 2008
This is an old tutorial from about a year and a half ago (GASP it may be 2 and a half years ago!) that i did for an online group i'm a moderator for. It was actually for a christmas in july crop!! A way to get some gifts done a little early! Still, i had a friend contact me today to ask if i had a cute way to package up some cards and envelopes. The first part of the tutorial is just for the holder. But the tutorial does go on to show how you can make 4 very basic cards of of very minimal paper utilizing every scrap.
WARNING! i tried to just copy and paste it from the other site and it was a major no go. So i'm editing and trying to scale everything so you can read it now. if this looks way too large to you... come back in about 15 minutes and everything will be right with the world. ok, so not the world, but everything should be right here!
"Greeting Card and Holder Class"
What you will need: (added note, this list is for the whole class which includes 5 cards. If you are just making the holder you will just need 1 12x12 sheet of cardstock and whatever else you'd like to embellish with!!!
1 sheet 12x12 cardstock (I chose a double sided patterened cardstock by American Crafts)
2 sheets 8.5 x 11 coordinating cardstock <
1 sheet white 8.5 x 11 cardstock <
12x12 Page Trimmer
Scoring Tool of choice (scoring blade, bone folder, etc)
Adhesive of Choice
Ribbons (about 30-35 inches)
Embellishments of choice (i used 8 mini brads, ink for edges and a couple of different stamps)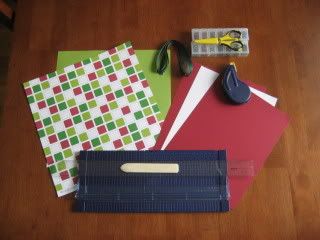
1. Take your sheet of 12x12 cardstock and cut in half. Set 1 piece aside and then trim other piece to 9.5 inches long. Set scrap aside. NOTE: you will use just about every scrap you have in this project! :)
2. Looking at your sheet as 9.5 wide, make a score line at 4.5 inches. Make another score line at 5 inches.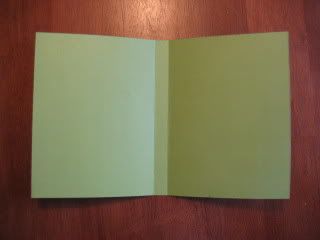
3. Take other 12x6 sheet of cardstock and cut in half so you have two 6x6 squares. Set 1 square aside.
Cut 1 6x6 square in half and then trim off a 1/2 inch off both strips so that you have 2 strips that are 5.5 x 3 inches. SAVE THE SCRAPS. Really, you'll use them. :)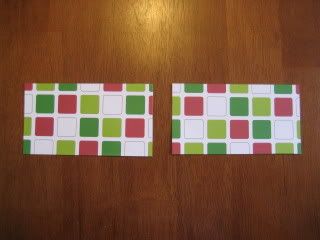
4. Now take 1 of you 5.5" x 3" rectangles and make a score line at 1/4" and 1/2" on both sides and bottom. 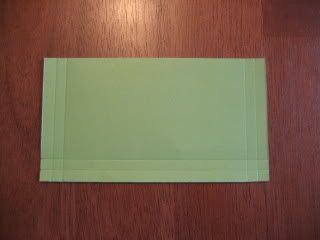
5. Look at the corners of your scored rectangle and you'll see 4 little 1/4" sqaures. You'll need to cut away the 3 outer sqaures as well as a the score line on one side of the remaining square. 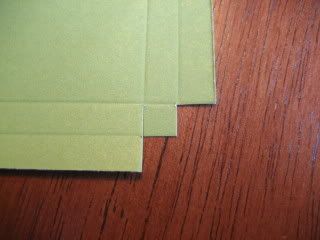
6. Fold all your edges in to start forming your "pocket". 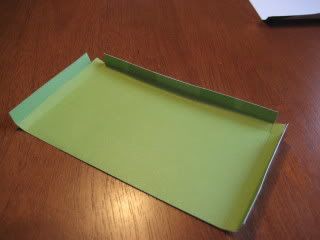
Add adhesive to 1/4" square and other edge to hold pocket together. 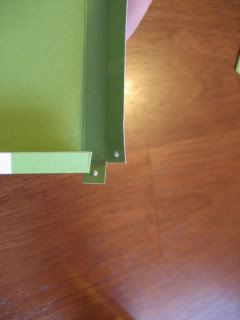
7. Repeat above steps to complete 2nd pocket and then adhere to inside of holder. 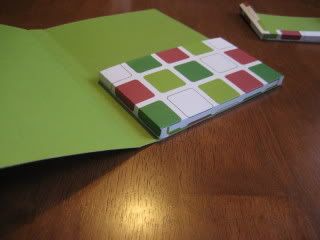
Set aside your card holder, we will embellish it a little later.
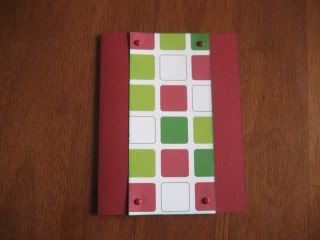
8. Now to begin your cards! Take both of your sheets of 8.5 x 11 colored cardstock and cut in half so that you have four 8.5" x 5.5 " rectangles. Make a score line down the middle of each to make your cards.
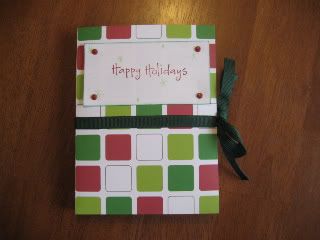
9. Card #1
Using that first scrap you made from making your holder - you should have a 6" x 2.5" rectangle. Trim to 5.5" x 2.5". Embellish as desired and adhere down the center of card #1. I used a mini brad in each corner. Please note, when using brads and eyelets, it's important to fasten them to the top layer only and then adhere the layer to the card. You dont want the backside of your brads and eyelets shown in the inside of your card.
10. Card # 2
From left over 6" x 6" scrap, trim off 2 3/4", then trim down to 2 3/4" x 4 1/4". Adhere to bottom half of card. Cut piece of ribbon to 4 1/4" long and adhere over seam. Use left over rectangle as an embellishment. I inked the edges and used a christmas stamp.
11. Card # 3
Take your last left over scrap from the 6" x 6" square and trim off 1 1/2". Then cut into 1 1/2" squares. Take the other strip and cut into 1 3/4" squares. Create 3 deco squares to embellish the front of the card any way you'd like. 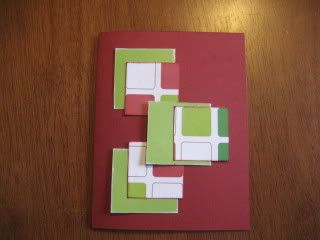
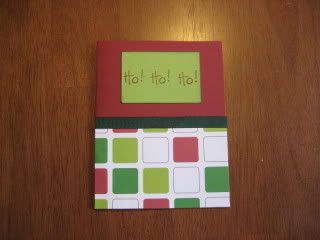
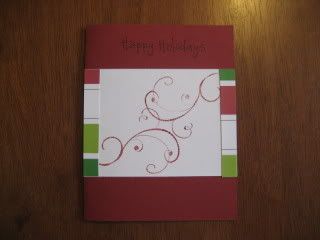
12. Card # 4
Take your sheet of 8.5" x 11" cardstock and cut off a 3" strip. Then cut that strip into a 4 1/4" x 3" rectangle. Adhere across center of card. Now remember those thin strips you didnt believe you'd use when i told you to save them?? Pull them back out of the trash can since you threw them out anyway and adhere them along the sides of the white retangle. I also stamped on the white as well as stamped a sentiment on the top for further embellishment.
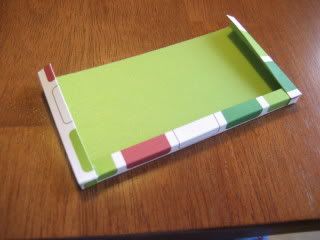
13. Now to embellish the front of your card holder! take about 2 feet of ribbon and adhere around the center of holder. Leave extra ribbon to hang off the side so you an tie a closer for the holder. Take the extra scrap from the white strip and adhere to top half of the card. I stamped a sentiment and also doodled little stars with a pen. I also inked the edges before adhering. 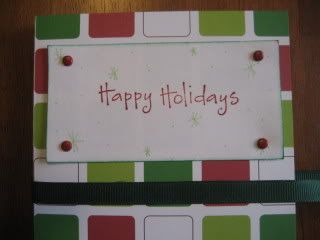
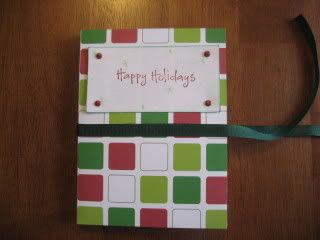
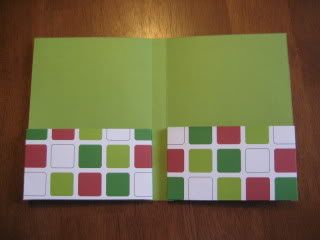
14. Insert your cards in one pocket and your envelopes in the other. Close and tie up your card holder! 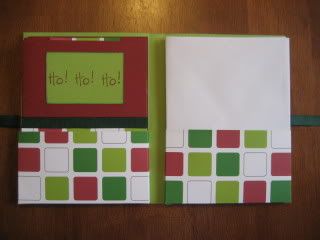
OPTIONAL - Take your left over chunk of white cardstock and cut into 5.5" x 8.5". Stamp the outside and adhere ribbon. Use what ever other embelishments you wish. This will be the card you include with your gift! 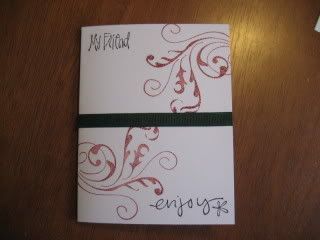
Thanks for taking my class! Feel free to post any questions and i'll do my best to answer them!


2 comments:
This is cute!! I might have to make some of these for next year!
Love the idea. I may try it for next year.
Post a Comment