My Time Made Easy: Insert Card Here

>> Wednesday, November 30, 2011

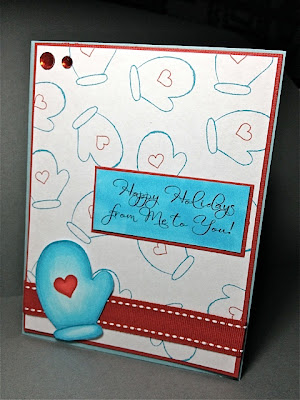
It's a sneak peek of whats to come from My Time Made Easy!

Tomorrow, the new templates, digi stamps and cut files will all be available to order!
Today the design team members are each showing you one of the new templates...
Insert Card Here

This template is so fun, so quick and easy but oh so necessary for your template arsenal!
How often have you gone out to get a gift card for someone?! Perhaps it's last minute and it's your best option. Maybe it's for that oh so difficult to shop for person on your list or maybe it's one of those everyone donates $5 for the gift (like for a teacher) and the easiest way to compile such a gift is to get a gift card! Well this template is exactly what you need!

HOWEVER... you don't need a gift card to make a super fun and cute gift idea with it!
You can create your OWN gift card! Kinda like a coupon or certificate, just cuter!

Here's my fun idea that I plan on giving to my hubby for chirstmas (good thing he pays no attention to what i post here!)

Here the Insert Card Here template, all tied up (it doesn't have to be tied down, but if you don't intend to tie it down, make sure your creases are well done on your insert!
Are you intrigued at what may be inside? Those jail bird details (just strips of black paper I adhered to the template) might give it away...

Hehehehe, i can't wait to see him laugh on christmas morning on this one. He always gets a kick out of the things i make him, but this one is funny too. :D
This is simply the best gift card holder i've found! I plan on using it over and over and over again!
Plus it makes you feel better giving a gift card when you've been creative with the packaging, right?!

Be sure to check out the other design team members today and get more fun ideas for gift giving this holiday season (and year round!)

Read more...

PMS Digi Challenge, Sketch Challenge

>> Monday, November 28, 2011

Well, I meant to post something here on my personal blog over the weekend but with the holiday and my anniversary... i never got around to it.

This is a double ended post today... so hang in there to see my Challenge card for the PMS Digi Makeover challenge.

As most of my blog readers know... Paper Makeup Stamps has been my baby for almost 3 years now. I started the company after my move from Los Angeles to the east coast. I started a family here and thought makeup artistry was my first business, paper crafting has always been my hobby. And thru the love of my hobby and finding a little bit more time at home now that I was a mommy... paper makeup stamps was born.

As my children have grown (not much mind you, they are 5 and 3) their needs have been more important. Its no longer just about spending some time at home with them. it's basketball practice and games. Choir and church events. Kindergarten and preschool productions.
And as their needs increase... so has my makeup artistry business. This past year has truly been a whirlwind for how much business I have picked up. Maybe word of mouth for being in the area? It's truly a blessing! But I've had to come to make some very hard decisions. With the increase of my first business, meant the decline of the time I have at home. Coupled with a 2nd business... something had to give. With this decision, I have decided to close out all rubber from Paper Makeup Stamps. I don't want to just let the company vanish as I truly love each and every one of the designs for paper makeup stamps and I have had the honor of working with fantastic illustrators. So I will continue on with digi sales of the stamps for as long as I can.
The rubber however, will be clearanced out. All stock that is on hand has been clearances to 45% off with the coupon code CLOSEOUT45. This is limited to stock on hand and no more rubber will be ordered. You can read more about the closeout on this post.

And now for my challenge card using some PMS digis!


I used Leif and colored him with topic markers.
I turned the sketch on it's side to accodmate the fact that leif is a bit wider than long. It's not quite cold here yet and the trees are beautiful shades of orange. Even though christmas spirit is in the air... i couldn't resist making at least 1 more fall card before the winter season is fully here!

Be sure to check out the PMS company blog to see the other designers fantastic takes on this sketch challenge!


Read more...

PMS Digi Makeover Challenge: Color Challenge

>> Monday, November 21, 2011


Super D Duper quick post, because I almost forgot and my bed (and child who won't sleep!) is calling my name!

It's monday and that means it's time for another digi challenge from the PMS Digi Makeover challenge!

This week's challenge is a color challenge! Easy peasy right?

And here is my card...
I just realized my color looks a little off on my skin but I promise my card is the right colors for the challenge! haha! Not sure what happened there.

Be sure to check out the pms company blog for more samples, a quick read over of the challenge requirements and get your creation linked up for the week and get your chance to win some free digis!!!

Read more...

Digi Makeover Challenge 11 - create your own background with a digi image

>> Monday, November 14, 2011

Monday means it's time for another Digi Makeover Challenge!


This week our digi team leader has challenged us to create a background using digi stamps!
It sounds a little daunting if you are not a "digi pro". I for one do not count myself as a digi pro by any means, but I do know how to manipulate digis. I will explain how i've done my card here in a bit. But i must mention that the team has done and absolutely FANTASTIC job of showing different wants to use your digis as a background! I am THOROUGHLY impressed!!! Lots of good ideas that I want to try now! Be sure to check them out at papermakeupstamps.blogspot.com

And now here's my card...


In photoshop.... I will start with that it will be helpful to use the .png version of this set. If you are starting with a jpg version, then just use the magic eraser tool (looks like an eraser with a asterisk) and delete the background.
i took the heart from the center of the mitten and copied it. Then i created a new layer and pasted it right where it was. Then in the layer effects, i used the color overlay and selected a deep red color. Then on my other layer with the mitten, i did the same thing, but chose a blue color.
Select your mitten using the marquee (dotted rectangle)...Having those 2 layers highlighted, go to edit and copy merged. This will copy both layers together. Then paste and move around as you'd like your pattern to be.

I also took the same mitten image and enlarged it and then colored it in with copics.
For my sentiment, i printed that also and simply colored over it with the same copic markers so it would match. Super easy and no need to put yet another piece of paper in the printer when printing out your digis!

So there you have it! Thanks for stopping by and remember to check out the PMS company blog for more inspiration!

Read more...

PMS, there's snow one like you

>> Friday, November 11, 2011

Today is the final day for the Release in Review cards from Paper Makeup Stamps.
You really should check out the PMS blog today as the design team members have really pulled out all the stops to show off the latest release from PMS!

Here is my card using one of the new Color Kids, Snowflake.


I colored her using copics
E00, E000, E21
Y21, YR23, E99
R81, R83, R85, R89
E31, E34, E37

Paper is from Art Warehouse

And now i'm off to pack up another wedding weekend (woohoo 11.11.11!) plus 2 tomorrow!
See ya on the flipside!

Read more...

PMS release in review

>> Thursday, November 10, 2011

Hello everyone!!! The new release from Paper Makeup Stamps is now live on the site!!! Exciiiiiiiting!!!!!! You can get yours HERE.

Here is one more sample from me... I made this card for the Release Party. Dawn challenged us to make a thank you card, so i used the Color Kid Gift Wrapper along with one of the sentiments from the Everyday Thanks set.


Photobucket

And I must say... my new camera phone did a pretty good job of taking a picture! I didnt want to leave the release party chat room to go find my camera and take the time of the set up, so i snapped it quickly with my camera phone! Not to shabby Apple! Not to shabby indeed!

I colored the image with copics and distressed the edges a bit with antique linen distress ink from ranger. I also use Spellbinders Dies and an ek success border punch. paper is from October Afternoon.

Be sure to check out the PMS company blog today for more samples from the design team!

Read more...

PMS BLOG HOP AND DIGI CHALLENGE IN 1

>> Monday, November 7, 2011


Oh my my my.... today is a big day! It's a monday, so a new digi challenge from the PMS digi makeover group. It's the 7th, so it's a blog hop day for PMS. And it's a release month, so that makes the blog hop even more exciting PLUS there is a release party tonight in the PMS forum!
It's going to be a goooood day and i'm so glad that I don't have any other plans (well, other than working on getting all the new releases ready for the website purchasing!!!!)

Now if you are following along in the hop, you should have come here from kristie's blog. If you are a subscriber, you really should start from the beginning of the hop over at the PMS blog because i don't want you missing out on a thing!

And before i get to my card, I have to mention the PMS digi Makeover challenge just 1 more time since i'm also a team member for the challenge group! The challenge is...
Which basically just means that we want to see another shape other than a square (or even rectangle) on your card or project!

I followed suit with my blog hop creation for you...

I used a sentiment from the digi version of the new set Handmade. As with all of the stamps this month, Handmade will be released in both rubber and digital format.
Since I used the digi version for this project, I had the luxury of enlarging the sentiment. The rubber version measures about 2 inches wide, while my version I used today is just over 3 inches wide.

With the Holidays coming up and many crafters still on a budget (or just loving to create special, meaningful and personalized gifts) this set is going to be a MUST have set! You can check out the PMS post from yesterday to get a sneak peek until tonight of all this set has in store for you!
It covers just about everything from the more generalized Handcrafted Just for You to the specific Hand Stitched For You By to the witty Repackeaged with Flair and Made by a Mad crafter after midnight... this set definitely covered the crafting basics. It also includes a few fun images you can use to layer or on their own.

Now if you want to make a project similar to mine... it's SUPER easy. Everyone who follows my blog knows i'm pretty much obsessed with anything beauty related. I am a makeup artist by trade, but I have always been absolutely addicted to bath and beauty projects. And this includes making them myself. Now I don't go too crazy making them, but there are lots of quick and easy methods to created soaps and bath products and the best thing is that you can easily personalize the scents to the gift recipient. I buy the majority of my soap making supplies from Brambleberry.com You can get empty bottles to kits with everything included. You can also get soap bases that you can then use to add your own fragrances and oils to cater to the gift recipient without messing with all the different things to make sure that the soap still works and does what it's supposed to as SOAP! It's so fun and EASY! And bonus, this is a great project to do with kids! So kiddos can make their own gifts for teachers, grandma, aunties, etc.

OK... now that I've made you all want to go out and buy soap making supplies instead of stamps (ah well, it's all in the love of crafting, right?!) it's time for you to hop along to the next on the list which is.... Anita Hovey!

But just to make sure that you haven't gotten lost in your hopping... here's a refresher list to keep you on track!


Have fun hopping!!!

Read more...

PMS sneak peeks day 2

>> Saturday, November 5, 2011

It's another day of peeks for Paper Makeup Stamps.
Today we are showing off a set called Color it Winter Tags.
This set is fun to me because it has a lot of different uses.
It's original intention of course was to create gift tags (check out the PMS blog to see all the stamps that come in this set!) but it will also be released digitally at a 600 dpi so you can enlarge the images all you want!

First I made some tags with the rubber. So many different images to make tags with! I'm super excited about stamping these out for the holidays!
Then to play around a bit, i used the same bird image as a digi to enlarge and create the focal point of the card.
The sentiment I still hand stamped so you can see the size of the sentiment in it's rubber form, however, i only inked up half of the sentiment to fit my card.


Thats all I have for you today! Be sure to check into the PMS blog for a chance to win this set!

Read more...

PMS sneak peeks begin!

>> Friday, November 4, 2011


Today is the first day of sneak peeks for the upcoming release from Paper Makeup Stamps!

For my sneakie peekie post, I made a card using Pete the Penguin. And I just had to make him PURPLE! :D


Isnt he a cutie?!

I used Copic Markers to color him in, and a glitter gelly roll stardust pen to add LOTS of sprakles along his scarf which of course didnt capture very well in the photo! Oh well.
I just want to SQUISH this guy though!

Ok, so here's the downlow... there will be a new release from PMS on the 7th. Check out the PMS blog to read the details and to see all the other fabulous creations from the design team!

Read more...

My time Made Easy: A holiday year in review

Its the last day of new release treats from My TIme Made Easy (not the last day to BUY of course!) and certainly not the last day of inspiration since MTME has challenges EVERY WEEK... but it is the last scheduled day of posts from the design team. :D

For my post today Im using the last of the 4 templates... Sleigh Ride. And let me tell you, making a cute holiday treat has never been easier! Seriously, this template cuts things just as you need and it can be put together faster than Santa can wrinkle his nose!

Here is my project...

I used stamps from some christmas sets released last year, Secret Santa and The Gingersnaps.

The bell was embossed with glittered embossing powder and then tied to the back of the sleigh.

The snow was created using a mixture of Liquid Applique, heated and then some glue and chunky glitter added on top.

Be sure to check out the rest of the team for more holiday inspiration today using new AND old from My Time Made Easy!

Read more...

My Time Made Easy, To The Point

>> Wednesday, November 2, 2011

Well it's time to get to the point.... my post is late. haha! Sorry about that. I suddenly felt VERY under the weather last night, so i needed to just go to bed which means my post wasnt typed, pictures weren't taken, etc. I do apologize for that! I'm still not feeling 100% but i'm standing, or rather sitting and not hunched over, so thats a good thing!

Another, to the point.... it's the name of the template i've used for today!

This box is actually VERY spacious! You can fit all kinds of treats inside. I had the perfect treat, a fun colored bath fizzy.... and then in my haste to get it photo'd and all, i totally forgot about it. OY! But it does fit one of the large Lush sized bath fizzies, so it's definitely big! Of course you could always scale it down if you wanted it a bit smaller. :D

Here's a picture of the end...
You have the option of folding the tabs in or out, creating a point, or the flared end. OR, you can do both and create a darling dreidle like Lauren did in THIS POST! The cut file actually comes with everything you need to make this perfect for the Jewish Holidays!

In my project, i did add some fringed yarn in the point to make it a little more party style. :D

Be sure to check out Lauren, Tangii and Lisa today for more wonderful projects!

Read more...

My Time Made Easy Release Post

>> Tuesday, November 1, 2011


The latest release from My Time Made Easy is now live and ready for purchase on the website!

Today the entire team has put together projects for you to get inspiration from using products from the latest release.

My project is, um.... a little... unconventional? Let's put it this way, have you ever done something for work that you personally are happy with, but you just hope you dont get in trouble? Haha, thats about how i feel with my project. It's not exactly on brand with My Time Made Easy, but i still think it's fun and cute!

Here is my project...

I used the new Cover-Alls template (so cute and perfect to create aprons of all types, or overalls, etc) and turned it into this little lingerie piece! haha! I was inspired by a recent bride who was telling me about how her bridal shower was a lingerie shower! So how fun would it be to package up a gift like this? Or perhaps a naughty little present under the tree for your hubster. I did not just type that. ;)

Here's a few more views...
Inside I tucked some massage oil and some sexy little things that i was NOT going to photograph and then put on my blog!

Here is the template put together and ready to fill...

I wrapped this super fun ribbon i've been hoarding around it to create the trim of the endies and a rhinestone to create a bit of bling for the belly button.

here's a backside view....


I also used one of the new digi stamps available today called Yummy Sentiments for my card...

Yes indeed it is from a cooking/kitchen set. The original design includes a super cute whisk that I took off for the purpose of this project. It would have been even better if i had some body whip to put inside instead of massage oil. but there is time to purchase that before giving. :D

So thats my not so um... modest... project.

Be sure to check out the rest of the team for their awesome creations!

Read more...
Related Posts with Thumbnails

Top Blog Sites

Blog Archive

Listen to makeupartistkaties playlist


Get a playlist! Standalone player Get Ringtones

  © Blogger template Webnolia by Ourblogtemplates.com 2009

Back to TOP