It's a Surprise Baby Shower Hop!

>> Saturday, July 31, 2010

My friend (and design team member) Lisa McKinney is expecting her 2nd baby ANY day now!
We decided to surprise her with a little shower hop!

I FINALLY got to ink up Baby Jamie! I'm sure you've seen the Baby Jamie fairy a few times in this hop but I think we are all just a weeeeee bit excited to add a new baby to our PMS family and we just can't resist!!!!

Here is the front of the card.... Isnt he just the cutest wittle guy you've ever seen?
I tried coloring him to what i assume will be his hair color (Lisa is blonde, but her other cutie has a strawberry blonde hair from what i've seen in pictures. :D)

I love this baby boy paper by Kaisercraft! I loved it so much... i actually decided to decorate the INSIDE of the card as well!


I used the A New Baby Wordart which i also havent had the chance to use yet! So many stamps.... sooooooo little time!

Ok, you have other places to visit! So now go hop to Ginger!

Hope your little guy is born happy, healthy and put safely in your arms VERY soon Lisa!

Read more...

a smidgen late with My Time Made Easy sneak peeks!

>> Thursday, July 29, 2010

I am sooooo sorry that my post is going up late. I am dumb and thought today was the 28th and that I would type my post up after I got to see all the goodies at the vendor show today at CHA. But it is not the 28th, it is the 29th! So now I am dictating my blog post and it is being typed in the car as we drive to Chicago. Go me! At least my project is done ;)

My project for you today uses the Tote-All Package Template. I adore this template! You can dress it up or dress it down, use it for so many different things, and it actually has a lot more space inside than you think.

Here is my entire gift set that I made for a girlfriend getting married. I made the tote to look like a fashionable makeup tote. Inside are 5 fabulous Smashbox makeup brushes, a foundation powder, mascara, and lip gloss, AND there was still room for plenty more.

I created my own designer paper on pink cardstock using black ink and the Fanciful Flourishes set. I’m telling you if you don’t have this set yet, GET IT! It is a lifesaver.


I added a faux closure on the front using a button and some black twine (there is a magnetic snap on the underside of the flap).


You will also see in the above pictures that I opted to fold the liner out instead of inside. I punched the edge of it with a SU eyelet border punch. Here is another quick pic where you can see the decorative edge and all of the goodies down inside.
Now onto the back, there is an adorable optional little pocket that I stamped the same as the flap and added a strip of the same ribbon handle to tie it all together.
Inside of the pocket, (YIKES! Sorry, I’m just the typist, but that is what Katie said while driving! Hahaha)… So, inside of the pocket is a makeup brush tip sheet.
If you look carefully behind the writing, I stamped the too cute fairy from the [tooth fairy set].


Whoops, almost forgot! To embellish the bottom portion of the tote, I used the Fanciful Flourishes set again with Versamark ink to leave a guide and then used hot pink liquid appliqué to add a splash of color.


Moving onto the card, I wanted a card to match the little gifty set so I created the same pattern on pink cardstock. I used the label and a sentiment from the Money Well Spent Set as well as the fairy again from the [tooth fairy] Set. I used the same bling on the card as I did on the pocket on the back of the tote to make it all match.


And this concludes my project today. Maybe I’ll have some fun pictures from CHA! So sorry again for my late post. Don’t hold my air headedness against me. If you haven’t already been to Lauren’s blog, you should really check it out. I have not seen it yet since I’ve been in the car all morning but my typist told me how stinkin’ adorable it is! I can’t wait to see it myself! And now,back to driving …

Read more...

Hello World...

>> Saturday, July 24, 2010

An ironic subject title.
Today I will be heading to North Carolina to go to my grandma's funeral.
She lived a good life, to 95 years old. Somehow it doesnt make it much less sad. So i'll be away from the blog world for a few days, but then i'll be back, and then i'll be gone to CHA! Thats my silver lining right now.

However, this is a card that I've had done for quite some time... and i just keep forgetting to post it! Silly me. The card was done in my copic class last month!


The stamps (both image and sentiment) are from an Inkadinkado set called Welcome Baby.
I truly adore this set. The baby images are just precious! There is also a turtle, puppy and bear as well as some other sentiments.

In the copic class, we were working on blending some tricky colors. I love these Blue Greens, but getting these tones to not look too bright and still give you some depth can be tricky. I started with BG10 and BG11. I added BG23 (the rest of the BG1_ family is too bright for shadows in my opinion) and BG72, BG75. The red patches are R24 and R27.

The paper is all from the My Mind's Eye Love me Love me Do pack. I totally heart my mind's eye!

So thats my card for you today. I hope that everyone has a wonderful weekend. Cherish your time with your loved ones!!!

Read more...

The Will to Day Dream...

>> Thursday, July 22, 2010

Ahhh... i am a dreamer... that is for sure! I love to day dream and have been a day dreamer ever since i was a little girl (and have gotten in trouble for it lots as well!)

And now its summer... one of my favorite things to do in the summer is just lay in the grass and look at the puffy white clouds. I have long had an obsession with clouds... this new craze of paper with cloud images... OMG, i'm in HEAVEN!

Well, today Paper Makeup Stamps is releasing a new Card Kit called The Will To Day Dream and day dreamy it does make me!

Look at this cutie fairy boy, just day dreaming away!

All of the elements on my card come from the Will to Day Dream card kit!

Just look at all this summer fun-ness!
* 3 Stamps... Will, the daydreaming fairy, Anyone of us wordart, thinking of you simple sentiment
* Eight 6x6 sheets of double sided patterned cardstock from American Crafts
* Four .5 x 6 inch decorative strips (ok, so they really kinda come with the paper, but they are über cute and worth mentioning on their own!!!)
* Two 6x6 sheets of specialty embossed cardstock from KI Memories (with a cute dogwood image embossed right into the cardstock!)
* Eight 8.5 x 11 Sheets of Bazzill Smoothies Cardstock - Ocean Breeze, Tangelo Blast, Carob Cream and Cherry Splash - YUM!
* Twelve glorious glittered paper flowers from American Crafts, all different!
*An assortment of coordinating buttons in all shapes and sizes (including some polka dot and glitter ones!)
* Ribbons! You'll get 1 yard each of a sheer turquoise with brown polka dots and a yellow grosgrain as well 3/4 yd of a fabulous 1 1/2 inch wide chocolate linen ribbon thats to die for!
* A Pack of Kaisercraft Pearls in a lushious lemon shade!
* a $5 voucher off your next purchase of $20 or more! (cannot be combined with other vouchers or reward points)

Superbly fun, right? Here's more on my card...

The glitter flowers are way fun and come in a variety of colors, shapes and sizes, but best of all, since they are from the same manufacturer as the paper (American Crafts) the colors match PERFECT and there are 10 different colors!!!!! I decided to fashion 2 flowers into something a little "sun-like" adding one of the many glitter buttons to the center and tying it off with some waxy linen thread (the only thing on this card that did not come from the kit!)

Here's a little more on Will, our day dreaming fairy!
I've colored Will with copic markers. Hair is Y21, YR23, Custom Blend Y20; Skin is E00, E21;
Shirt is BG10, BG72, Custom Blend BG100; Pants and Shoes E43, E44, E47; Grass YG21, YG23
The sentiment you see above is also from the kit! Such a darling font, it can be used over and over and over again for so many cards!

So you are aching to dream away with this kit too, right? You can buy it RIGHT NOW at Paper Makeup Stamps just by clicking HERE. But hurry, there is a limited number of kits available!
Go get yours now!

Read more...

Copic Airbrushing...

>> Tuesday, July 20, 2010


I'm just going to stop pretending to be shocked when i realize i havent posted for a week. Haha. It seems to happen all too often, especially in the whirlwind of the summer! Though the past week has seemed to fly by! Friends on facebook have been seeing my slow but getting there process of getting my craft room finally in order. The boys have spent many days outside swimming in playing in the crazy heat. I've been busy with my various businesses (wedding season!!!!!) But all of that is pretty boring. Perhaps i would have more time to post if i wasnt always chatting away!

Anyhooooo----- tomorrow (wednesday, 21st) is my 2nd copic class for Scrapnesia (a local stamp and scrap store). I was thrilled with the turn out last month. I met quite a few new ladies which is always fun! And I saw some old friends as well!

This is the card we'll be creating tonight in class along with learning the basic ins and outs of the copic airbrush system...

Now i'm not gonna lie... my card is a CASE of one of Theresa Momber's card. Theresa's cards make my heart go pitter patter and this one in particular has been on my mind since oh.... APRIL! You can see her card HERE. For those who don't know what it means to CASE someone's card... it means Copy And Selectively Edit. Now my card is pretty darn similar, but there are a few differences. The stamps are very similar, but different companies. Theresa has sponged the card, while i've used the airbrush and instead of using an emboss resist technique for the branches, i've created a stencil using SCAL and my cricut. I'm honestly not sure what the airbrush would do with an emboss resist, though since you can color just about anything with the copic airbrush, i'm going to guess it wouldnt exactly, resist. :D THe stencil was a good solution to me.

Since this is the card i'm teaching in class tonight, i'm not going to break it down step for step but I will let you in on all the elements used on it! THe butterfly stamp is from Garden Delights by Inkadinkado. I colored the butterfly using a flicking technique and copic markers (YR18, YR15, YR12, Y38, Y35, Y32). The butterfly was then cut out and set aside. I got this FREE svg file from My Cricut Scrapbooking. I used the cutout to create a mask for the white branches and then used the rest of the sheet as a stencil to create the darker orange branch.
The grass image is from the Faith Hope Love set from Paper Makeup Stamps and the sentiment is a simple sentiment also from Paper Makeup Stamps.

The airbrushed background is using the same markers that were used with the butterfly!!! And the butterfly was popped up using some foam adhesive.


Ok, I have a little one squirming all over me and I really need to get him into bed! So, off I go! Have a wonderful evening or day depending on when you read this!

Read more...

Monochromatic Challenge with All That Scraps

>> Wednesday, July 14, 2010


Every wednesday, All That Scraps has a new challenge for it's fans
(and i must admit, it's been too long since i've played along, shame on me!)

Today's challenge is a Monochromatic challenge and I felt so honored when my friend, Lesa, asked if she could use my video tutorials and if i'd like to play along with the challenge!
Well, DUH! I love the CC Designs images that All Thats Scraps has AND you KNOW that i just love love love to color in monochromatics so I was definitely up to play!

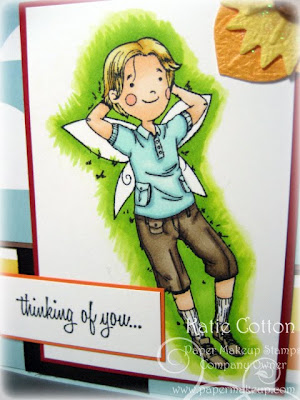
Here is my card for you using a stamp from the Swiss Pixies collection. This particular sweetie is named Gretel and you can get her in both rubber and digi form!


Now coloring in Monochrome or Monotone does not mean that it has to be "black and white".
In fact, you can really have some stunning outcomes by sticking to all one COLOR.
And if you happen to follow my blog, you may have seen my last bought of monochromatic fun-ness using various colors on THIS post)

For this challenge, i decided to stick with that made me fall in love with monochromatics, black and white! I love seeing stamped images in black and white, it makes me think of black and white photos, which i also love!

For this card, i chose the neutral gray family. Now, any of the grey families work great for a
b & w card, but you do want to make sure that all of your grays are from the SAME categories. using a c1 with a w3 just wouldnt look right at all!
For those who might not know copics, or are new to copics, the letter in a grey copic determines the "temperature" of the gray. A C is a cool grey, a W is a warm grey. Those 2 seem pretty self explanatory, but what about the other 2?! Well, the N stands for Neutral (which i've used on my card today and are a very safe grey color family because it's well... NEUTRAL. The last of the 4 is the T category which stands for Toner grey. What the heck is "toner" grey? Well, before my love affair with copic markers... if you had said "toner" to me, i would have thought of 2 things... washing my face, and dying my hair! Yeah i know, beauty on the brain. But hey, it's what i do. In both instances however... it boils down to the same thing. Toner neutralizes. For you face, toner helps to neutralize the pH levels and cleanse the skin. For your hair, particular for someone with light hair whether it's grey or bleached, a toner is added to help neutralize brassy tones, etc. So, toner... is to neutralize.

Well what the heck, isnt the N for neutral?! Haha, yes. If you were to line up the copic greys from coolest to warmest it would go Cool, Neutral, Toner, Warm. Both neutral and toner are in the middle ground, not too cool not too warm. But toner still has more warmth to it than neutral. Does that make any sense? I hope so, because now i've babbled on entirely too long about the hues of grey!

Back to my card!


So i used the neutral grey family. The thing you'll want to remember with any monochromatic coloring is that 2 parts that touch that would be different colors, need be be different in light or dark, as to not look flat. Example, her shirt (which has a base color of n2 needs to be different frm her romper which i colored a basic of n6. If they were both too similar, the colors would all run together and the overall image wouldn't "pop" as much. I apply this rule to each section that touches. Shirt to romber, shirt to skin, hair to skin, etc. I just think it helps the overall look.

Here's the breakdown... Hair N8, N6, N4, little bit of N2
Skin... N1, N0
Shirt... N3, N2
Romper, Boots... N8, N6, N5
I did use a white gel pen to put the white back in her eyes (easier than trying to color around!)
And i also added some white dots to her cheeks. This helps break up the flatter color since typically i'd add more pink there.

So thats my postie for you today! Be sure to check out the All That Scraps Wednesday Challenge for more FANTASTIC samples by the design team and to play along yourself!

If you have any interest in checking out the monochromatic videos i've done, here are some quick links...
And if you'd like to check out any of my other Monochromatic posts you can click HERE.

Thank you SOOOOO very much to checking into my blog and have a wonderful day!!!!

Read more...

Retail Therapy with the Playdate Cafe!

>> Monday, July 12, 2010

I have long been wanting to play along with the PlayDate Cafe challenge blog. For one it has the cutest name on the planet! For 2, my friend Stephanie is on the design team, and I like to support my friends and the design teams they are on.

Well, for some reason when i saw the challenge for this week (PDCC37) using a gorgeous photo from a webshop in the south of France called Boutique Provencale, SHOES popped into my head!
When i think of France... i think of my very very favorite shoe designer, Christian Louboutin.
And one day i WILL own a pair of his glamourous shoes, but for now, i will make them on a card!

Today is also the Release in Review day for Paper Makeup Stamps reviewing Retail Therapy. While i had a completely different card in mind, i abandoned all thoughts of it, and immediately knew what i wanted! A nice big High Heeled Pump! And i wanted it to be FUN! Just like the CL shoes so often are.
Here is my card!


Now if i this was truly a CL shoe, it would have a red sole.
But you cant see that in the picture, so it's ok! Haha!

So how did i create this shoe... Well, i decided to use the digi version of the Retail Therapy and took one of the shoe images (it was easiest to take the one from the wordart sentiment since there was nothing else around it) and then mega sized it. This is precisely why i love digis. Especially for sets like this one where you have lots of different images you can resize to make focal points on your card or scrapbook page where maybe the rubber version isnt large enough to be a focal point. I printed out the digi right onto the DP (kaisercraft) and then cut it out. I colored in the heal with a black copic marker. Then i printed it out again just on plain white so that i could make the inside of the shoe. I cut the white out and adhered it to the shoe.

For my sentiment, i used the rubber version. Digis are great to be able to resize, but if i'm using the set size, i'd much rather get inky myself! I stamped out the sentiment on white cardstock and then colored in my shoe with copics. Any markers would have sufficed, i didnt do a lot of shading since it was a small image. I then took a white gel pen to recreate the polka dots from the DP.

Aside from the kaisercraft paper used for the shoe, the rest of paper came from the scrap bin! In fact, i think the yellows were from my very first "paper slab" that i bought when i was getting into scrapbooking! hahaha!
The red embellies on the bottom are from Martha Stewart Crafts.

Now dont forget to check out Tangii, Maria and Danni as they have some wonderful creations using the retail therapy set today too!

And check out The Play Date Cafe and play along in their awesome challenge this week!

Read more...

Can you Handle this? CTD with PMS

>> Sunday, July 11, 2010


Can you handle a Color Throw Down with some PMS thrown in there!?

Recently, the Color Throw Down Challenges blog celebrated it's 100th challenge! And if you are an avid blogger or even avid blog reader, you probably have heard about the big blog hop and the MASSIVE prize stash they have to go along with it! One of these prizes even includes the stamp set i'm about to show you! (in fact, in includes the entire July release from PMS!)

I actually wasnt "assigned" to do a review card for the Release in Review for Paper Makeup Stamps, but I so badly wanted to play in the Color Throw Down challenge.... and i adore this set! And i needed a bit of wind down time after the wedding i did hair and makeup for today!
So this was the perfect opportunity to get inky!

Here is my card...

First i took the large silhouette stamp and inked it up in sweet leaf ink by CTMH (the only certainly celery i have is craft and wouldnt show up on the baja breeze cardstock). Then i stamped the condensed silhouette image on a separate piece of white cardstock and sponged the edges with regal rose ink and layered it over the background image on foam adhesive. The dandy centers were adorned with stickles. :D


My sentiment is also from Paper Makeup Stamps but released eons ago! One of the very first releases, but it works so well, dont you think? You can find all of the stamps i used on my card today HERE.

There are more cards by the Paper Makeup Artists using the Dandy Wishes set today on the Paper Makeup Stamps blog! Go check them out!

Have a Dandy Day!!!


Read more...

Paper Makeup Stamps Blog Hop!

>> Wednesday, July 7, 2010

Hello and welcome to the Blog Hop for Paper Makeup Stamps!
This is my 2nd post for the day! Be sure to scroll down to see my post for My Time Made Easy!

First, before you all think i forgot my letter, i did not. I dont have one. The new team is so big, that there was no letter for ME! Haha! So you'll start your letter collecting at the NEXT blog. :D

If you didnt start at the PMS blog though, go there first, read the deets and then come back here. There is some important information I dont want you to miss out on!

Ok, here is my card...

I think it's quite possible that i've never been as in love with a stamp image as I am right now.
Those lips are KILLER! Ok, so obviously I am going to be loving a makeup set right?
All the stamps on this card are from the Kiss & Makeup set. The set is also going to be available in a bundle called "Everything a Girl Needs" as an uncut 8.5x11 sheet crammed full of fun images and sentiments all to do with beauty and fashion and shopping. Ahhhhh. Truly, everything a girl needs, right?


Ok, so what did i do to create this card? Well, the larger lips stamp i knew i wanted it to be red red red. I mean, thats what the quote is all about, right? (i love that quote!) So i stamped the image in versamark ink on black cardstock and then embossed over it with Top Boss embossing powder in red. It's so hard to find a red OPAQUE embossing powder and i looked for ages finding that they werent truly opaque on dark cardstock until i found this Top Boss one. :D
I then did it again and cut those lips out to pop up on the card.

You'll also notice my super fun patterned paper? That was hand stamped by Moi using the larger and smaller lips from the set!


Then we have the sentiment!
Now i love this quote, i have loved this quote for a long long time! I really do love Gwyneth Paltrow. She's such a talent and classic beauty!
But then the quote is just so perfect, and so me. Except i rarely wear red lipstick, but still, you get the idea!

Shaela and I went back and forth about this quote and whether stampers would find the quote to be "too much" which is why i love the symbols. It's the perfect happy medium and it just cracks me up!

I traced the word red with a red copic (R29 which is Red Lipstick! Just to help get that extra punch in the card.

SO thats my card for ya! Now it's time for you to hop along to one of our new team members, Bonnie Sharp!

Have a fantastic day!!!

Read more...

Group Share for My Time Made Easy.

We've bumped up our group share day for My Time Made Easy this month! Which means i'll have not 1 but 2 fun posts to share with you today! Woot Woot! I love the excuse to get extra inky! My 2nd post wont go live until 7am, so you have 7 hours to wait for the friends who happen to catch this as i post it!


Today I have another Flapper project for you! This one is a little more sassy than the last one that I kept more serene and slightly masculine.

I love red and black together! So much that it's all over my craft room! But sometimes, it's nice to throw a little bit of other color in there. For this project, i was inspired by a sunset. In my first thoughts, i was going to create a scene on the front that looked a little more sunset-ish. But then i realized i stamped a scene last time on the flapper box! haha! So i just stuck with sunset-ie colors instead! The black was just enough to set the color apart and give it some pop.


So last time, I filled the Flapper box with some Wallflower scent bulbs from Bath and Body Works.

This one is still filled when some yummy scented goodness... but the bath salts I "made" myself! You may remember a previous post where i showed step by step instructions to making your own bath salts. It is really SOOOOO easy! But before i get to that, let's talk about the box! I knew i wanted to add some "fringe" to the flapp. So i cut an extra piece of cardstock aside from the template design and used punches by martha stewart to create the loops. I also remembered why i dont do that more often... lining up the straight edge with the corner is a pain in the batooski!
I stamped the front cover with the words Bath Salts from the Take Time stamp set (which truly is a go to for me! Its the 2nd time i've used it this week!) The Mind • Body • Soul sentiment is also from that set. My fun floral branch on the side is from the new set Killer Curves which I am also loving and know it will be a go to for me! The top is adorned with black bling (which look like circles but they are rhinestones!) and the front is adorned with some orange bling as well. I was all about the bling when creating today!

Ok, back to the bath salts inside the box!
You can see in this photo how the flapper box works. I decided to put a magnetic closer to snugly hold the top down in place. I'm the queen of spills (i spilled the bath salts all over the rug in my craft room just trying to get the bowl over to the box!)

Now, see how the bath salts sparkle and shimmer?! That isnt just lighting, thats because i put cosmetic grade colored mica into the bath salts! Bonus, it makes bath water and skin shimmer as well. It's a VERY fine grade of powder so we arent talking about chunky glitter everywhere, just a beautiful sheen that is so nice in the summer! The mica color was already a golden hue so I didnt have to add any other colorant to the salts.
I did however add a nice amount of fragrance oil in a fresh melon scent making for a very refreshing bath experience! I got my mica from BrambleBerry.com!


Ok, one last picture for you, because i took the picture, and you may want to see the card closer up and get a few details about and the paper used on my project (since i didnt mention it already)

All of the cardstock for my project is from Cardstock Couture. I am HEARTBROKEN than they have sold the business. I'm not sure what is in store for their paper, but it's a sad sad day for me.

My card came together simply, as I just wanted a sweet little card to match my template project.

I used one of my test/practice pieces of loops and the other cardstock pieces were from the scraps as well. I used a wider black satin ribbon, but it keeps the same feel as the box and then the same bling was used. The sentiment on my card comes from the new Tending the Garden set from MTME. I love the idea of giving bath products especially ones for the BATH to someone who deserves a pat on the back.
Sort of a, "you did it! now relax!!!" sort of thing!

Well, thats my project for you! Be sure to check out the rest of the MTME team (links are in my sidebar) as everyone has a project to share with you today!!!

Check back in later too for more fun!


Read more...

A CAS is just dandy!

>> Tuesday, July 6, 2010

Hello! Well, my computer is still working! Let's hope it KEEPS on working!

Today I have a CAS (clean and simple) card for you! I'll cut right to the chase and share my card...


I can not even begin to tell you how much i love this stamp set! It's called Dandy Wishes and will be released from Paper Makeup Stamps on July 7th! Ok, so really i'm obsessed with dandelions. In fact, i'm obsessed with anything you can "wish" on. Stars, dandies, pennies on the ground, clouds (which i guess you dont wish on, but you dream as you look at them, or at least i do!) I guess i'm just the wishful and hopeful type! But even though i've always loved dandelions... they took on a whole new meaning to me when i had kids. Jack and I go on fluffie hunts often. We'll even stop the car if we see a field of them somewhere. they are so much fun and it's hilarious to hear what jack might wish for. Sometimes its to play with me all day. Sometimes it's that i'll give him "pink milk" when we get home. hahahaha.

This picture below has been a favorite of mine for a long time. I cant even remember where i found it now... I decided to use it as inspiration for my card.

Since you can practically feeeeeeel the softness of the fluffs in the picture, i wanted that feeling from my card as well. So i used fun flock! I also used a little gem for the dot in the i in the wish word!


Now head on over to the Paper Makeup Stamps blog to see what the other Paper Makeup Artists have come up with for today! You can also get yourself entered to win this set!

Have a DANDY day!

Read more...

Bon Voyage! PMS sneak peeks day 3!

>> Monday, July 5, 2010


Hello! I hope that everyone had a wonderful 4th of July! I only got to catch a clip of fireworks as they absolutely terrified my youngest son (who is 21 months old). Nothing scares this kid... well until today! I've never seen him like he was, he screamed and cling to me and was actually shaking! Poor guy! He then grabbed on to his big brother (while still clinging to me) for extra comfort. Poor guy, so I took him home and let big brother (4 years old and FULLY enjoying the fireworks and all their loudness) this year. Sad thing is we didnt even get close to the BIG ones. I'm thankful we were so far away now!

Ok, back to the papercrafting side of things!

Today is the 3rd day of sneak peeks from Paper Makeup Stamps! Many of the other Paper Makeup Artists are showing off FAIRIES today! THats right, after their vacation last month, we have 2 new ones for you this month. However, i decided just to play with one of the accompaning images.

This is Lisa's Luggage (and sentiment which is sold with the luggage)


The luggage creates a perfect inside the card stamp when using the Lisa Fairy on the card front (check out the PMS blog for samples of the Lisa Fairy or check out Lisa Kind's or Lisa McKinney's blog today.... how many times can i type Lisa in one blog post? hmmmm).
However, this image is large enough to work solo on a card as done in my picture.
Paper Makeup Artist, Sherry took it a step further today and layered the image making LOTS of luggage! How fun is that! See, it's a very versatile image! :D

This card is another one that came together pretty quickly. With the right papers, i've found cards are much easier to create, and i have a LOT of paper. I just needed to go thru it all to know what i have! This patterned paper by Junkitz i've probably had for 2 plus years! It was high time it made it's way to a card! perhaps i will use the other 5 or 6 sheets i have on a scrapbook page! What do you think? Sheesh!

The image was colored with copic markers... E42, E43, E44, E47, E49 (different parts of the luggage used these colored, from the darkest browns to the lightest... the e4_ family is great as a neutral brown family that is a little more greyed and matches just about anything)
Misc other copics to color the stamps and things on the luggage R08, R27, Y17, YG13, YG17

I embellished my card using some punches by Stampin' Up (the photocorner punch and the fancier word window punch which i'm sure has a better name than that, but it's 2 am as i type this (was woken up by more fireworks - and that seemed better than my alarm going off at 6am to type it!). I also used some fiber by Adornits (EK Success).

But back to bed i go! Thanks for dropping in today! Be sure to check out the PMS blog for a chance to win the 2 fairies being released on the 7th as well as the stamps i used on my card today!!!

Read more...

And finally my card!

>> Sunday, July 4, 2010

Man, i really do need some retail therapy! Maybe of a new computer!
I got the computer issue sorted out WE THINK! I finally figured out i could turn my computer on if it was sideways (dont ask how i figured that out!) But that established it wasnt a software problem, it was an inner workings of the computer problem. And since we just installed a new hard drive (as my other one died last week as you might remember), that was the first place i looked. Sure enough, if i turned the computer upside down, you could see the harddrive move. Like it wasnt fitting snug as it probably was supposed to. Being the crafty person i am, i made a little cardstock shim like I would if my dies werent quite tight enough in my cuddlebug. And as of right now, it's working! Let's hope it stays that way!

Ok, so today is the 4th of July! Happy Independence day to all my American readers!
We plan on spending some fun time grilling out, but first i do finally get to share a card with you!
Here is my card showing off the soon to be released Retail Therapy set, designed by Shaela Odd for Paper Makeup Stamps. This set is so fun. I'm a big fan of nice large images so i can color (or paperpiece) so i tried to keep many of the images a good size. Big enough even to go on a scrapbook page, but not so large they they really wouldnt work well on a cardfront. If i do say so myself, i think i did a great job on sizing! haha!

Here's my card using the adorable purse image!

I was so excited when i found this paper at my Local Scrapbook Store, Scrapnesia. They carry all the My Mind's Eye papers and lately i have been LOVING My Mind's Eye! This paper (from the Abbey Road collection) was beyond perfect for this card! The entire sheet was just smaller than 12x12 with a very fun decorative edge. I trimmed off the edge and use it on my card (similar to what i did the other day with the sassafrass lass paper!) This may be my new favorite way to maximize some paper!

I added a pearl by kaisercraft to the closure of the purse and used Liquid Pearls to make the handle of the purse a little more 3D and lush.

For my sentiment strip I added some rather large pearls by martha stewart. Very fun and eye catching!

Whew - so thats my card for you. Better late than never i suppose! Dont forget (if you havent already) check out the PMS blog for more sneakie peekies! And have a fantastic day!

Read more...

And my computer is out again

Well, bad news. My computer is our again. It just won't start up and I don't have a clue what the problem is. I'm so sorry!

I am updating both of my blogs from email from my iPod.

Sine I am unable to load any pictures, check out these fabulous design team members for sneaks of the new set, Retail Therapy designed by Shaela Odd!

Tina Hale
Tangii Crain
Christi Thorsen
Shaela Odd
Anita Hovey
Bonnie Sharp
Stephanie Zito


Hopefully I'll be able to update the blog better a little later and even include my own card!

Leave a comment on this post with what your favorite part of the set is for a chance to win it!


Sent from my iPod

Read more...

Hello from Durham! Sneak Peeks for PMS July begin!

>> Saturday, July 3, 2010


Hello from Durham North Carolina! I decided to head up to Durham NC for a few days while the sneak peeks are getting underway to spend some time with family. My grandmother has not been well and has been moved into nursing care. Since i'm aware that this very well could be the end of her wonderful and long journey here on earth, I wanted to be sure to see her with the boys one last time. It will be a short trip, but a nice break as well. We'll likely be heading back to South Carolina tomorrow to be with daddy for 4th of July festivities!

But thats not why you came to my blog-a-roo today! The sneak peeks for the July release of Paper Makeup Stamps are underway! And I have a card for you that i'm actually tickled pink with, and guess what... it took me 7 minutes to make!

I used an oldie but goodie... Ashlie's Solo Snail to pair with my sentiment, a new release from the Cutie Critter Sayings set. The new set will be released on July 7th at 8pm CST.


So here is my 7 minute card! I do have to say i had some help from a really stinkin' cute paper line! The company is Sassafrass Lass and i'm really sorry i dont remember the collection name and now i'm not at home to look! But i just love the paper from Sassafrass Lass! It's thick, but not too thick. Double sided. SUPER fun! The colors are INTENSE, nicely saturated color and bright, but not bright neon bright. They are playful and just "cool". And the other thing i love... 1 edge on every sheet is this funky ticket like cut. And that strip with the funky border is a different pattern than the other patterns on the paper. I used part of a border on my card to give a quick nifty look that i didnt have to take the time to punch out.

So did this card REALLY take me 7 minutes? Yes it did. The other night it occured to me... OH SHOOT! We're starting sneak peeks a day early! I'm not ready for that! And i knew i'd be leaving the following morning to drive to durham. SO here i am, coloring at 1:30 in the morning!
Even know the snail image isnt technically a Retro Cutie Critter, he was illustrated by the same artist (Diem Pascarella) for the Ashlie Fairy. And he perfectly matched one of the bonus Cutie Critter Sayings so i just had to use him on a card. And another bonus, i think i could color this image in my sleep as it's one of the images i use in my Copic 101 class! So that was on my side. I colored him in about 5 minutes if not a little under. I stamped my sentiment underneath and went to bed! The next morning i woke up and after packing up some things, went to finish my card. Since reorganizing my papers (as i mentioned in my post yesterday!) i instantly remembered the fun paper from Sassafrass Lass. I cut my standard background (4x5.25) and then a strip of another pattern. I then cut off the cool border i was telling you about and took another small square of the strip cut and flipped it over for the card. Quick and easy my card came together without much thinking. I added the brads for some extra dimension, sponged my image and papers and added some white souffle pen to the image. It all got glued to my card base and bada bing bada boom, my card was FIN! I grabbed the camera, took a shot and luckily it worked out because i didnt really look at it before i left home!

So thats that! And for those who really dont care about that part and just want to see the pics...here's a closeup of the colored image...


Ok wow, i didnt really mean for it to be THAT big, but ya know, i'm too tired to resize it, so you get to see the snail in extreme close up view! I really gotta figure out the best sizes for blogger!
This image, like i said, i think i've colored in my sleep! It's a great image to learn off of.
I colored on Couture Cardstock - One Sheet Wonder for this one with the following Copic Markers: E33, E35, E27 (which i realized only after i started i did NOT grab the E37, oh well)
I added a white souffle pen (by gelly roll) for some highlight accents and made sure to also add a white dot to the snails eye. The grass i drew in after the snail was colored using some flicking motions with a G28 copic marker and my sky is B000.

Thanks so much for stopping by! Be sure to check out the PMS blog for some more wonderful sneak peeks and a chance to win some free stamps!

Read more...

My Time Made Easy with a Wonderful Watering Can!

>> Friday, July 2, 2010


Today, I get to share a treat with you from My Time Made Easy!


I know I talk about why i love MTME every month, but I do get new subscribers just about everyday (THANK YOU!!!) so I feel like i should reiterate a bit... if you've heard my spiel, just scroll down. :D My Time Made Easy truly is just that! We are all busy people! I know that myself, I am first a Mom and a Wife, then i also run 2 companies, have design team obligations, I teach at least 1 class a month, I try to donate what time i have to my church, and then I'm still human and I like spend time with my friends as well as BY MYSELF! So all that... yea, it's hard to make a gift sometimes. But homemade gifts are the best! Plus what if it's something you'd like to do for someone but you dont have a lot of funds, or maybe spending a lot isnt appropriate?
Well thats when all the things that MTME has to offer comes in handy. I give many of these template gifts to Jack's teachers and ladies at my church. They feel like i must be superwoman, but really, I just took an extra 30 minutes of my day to make something special for them. Given all that i do, those 30 minutes are precious, but the gifts come together so easily and it's so much fun!

I had a blast putting together this awesome template to share today! My head was bursting with ideas, but in the end, i kept it to a wonderful watering can! But think of all the reasons to give a watering can to someone! Mine is going to have a gift certificate to a local nursery inside! I've also used the cut file of the Perfect Pansy and made it come to life with and airbrush!

Ok, i'm getting ahead of myself! First, let's view this Wonderful Watering Can!


Isnt it Cah-Ute?! I especially love the extra score lines making it look so much like a real watering can! First I assembled the entire project using cardstock from Couture Cardstocks in Meadow. Then i took a strip of some DP that i've had seriously forever (i rediscovered when i reorganized my stash recently). I matted the strip with some white cardstock that i punched an eyelet scalloped border (a punch from Stampin Up). A strip of rhinestones along the bottom my Glitz finished off my base.

Here's a quick "aerial" view the watering can. I did use the same DP on the top, the sunlight just washed it out a bit in my photo!


Now time for some stamping! I used the Tending the Garden stamp set for the cover of the watering can. This completely covered the "seam" of the 2 pieces of paper together.
I stamped the frame in Melon Mambo ink (SU) and cut it out. The fronds on the inside was stamped in Clover Meadow (CTMW) and then the sentiment in Tuxedo Black (Memento).
All of the stamps are from the Tending the Garden stamp set! But this set has SOOOOOO many other sentiments and adorable images. You should really check it out!

You'll also notice in the above picture, i added a few other embellishments to the watering can.
The dragonfly is actually a punch by Martha Stewart. I colored the body in with a copic marker (E47) and then added stickles in Fruit Punch to the wings.

The more "fun" addition to the watering can that i did was the pretty pink pansies. Yes i know pansies are supposed to be purple, but pink went better with my paper, so let me live in my dream work of hot pink pansies! :D

Here are 2 close up shots of the pansies...


Arent they fun! The Perfect Pansy is actually a cut file from My Time Made Easy and is available for a mere 2.50! You also get leaves when i opted not to cut, since the green wouldnt stand out against my green watering can anyway!

My trick to get them to come to life was to use the copic airbrush! Easy enough, i cut the pansies out using Sweetheart cardstock from Couture Cardstocks. Then i used a copic RV29 marker in the airbrush. I sprayed the center and just the outer edges of the petals. You could get this effect as well by sponging, but the copic airbrush was way faster and for me, i get much more consistent results. I then bent each petal with my thumb and forefinger before gluing them together. I used some orange flower soft in the center to really bring them to life. So, maybe not so much like a real pansy, but pretty, at least i think so! You should see Lauren's post HERE where she did some great things to her pansies as well!

So thats my project! I have decided to pick up a gift certificate to a local nursery and tuck it inside when I give it as a gift, but since i havent figured out it's recipient just yet... i dont want to do something silly and have the gift certificate expire or have them write the date of when it was purchased on it and then something think its a hand me down gift! hahaha!

But wait... one last picture! I was ecstatic when i was taking my picture (i took the picture outside because afterall, thats where a watering can belong, plus the boys were DESPERATE to play outside... but to wait do my eyes appear...

My peppers!!! Ok, so i've never really had my own garden! This is my first attempt and really, it's more of my husbands but still, i have some green peppers that will be ready soon! Yiipiiiieeee!

Ok, be sure to check out Lauren and Silke
for more devine creations!

Have a wonderful day!

Read more...
Related Posts with Thumbnails

Top Blog Sites

Blog Archive

Listen to makeupartistkaties playlist


Get a playlist! Standalone player Get Ringtones

  © Blogger template Webnolia by Ourblogtemplates.com 2009

Back to TOP