PMS Freebie Friday!

>> Friday, July 31, 2009

Sorry i've been absent for a coupla days!  It's been a mad house trying to get things in order before i leave town tomorrow plus on top of that it'll be SNEAK PEEK WEEK for Paper Makeup Stamps august release!  Bad time to be out of town, huh?  Well, i'll still have my computer and the ability to post, just not the ability to craft, so i need to have everything together and photographed before i leave!  So thats what i've been busy doing!  I DID have a post for yesterday, but an absentee camera made that null and void for me! grrrrr.


Ok, today is friday which means PMS has a freebie digi for you.  Go to the PMS blog to read all about the freebie, and see some utterly fantastic creations by some of the design team members!

Here's a picture of whats being given away...


And here's the card i made for my hubster...


A little background on the freebie. This is one of the ones that i put together. Since i'm leaving town, and then the day before i get back my hubby will be leaving town (bad timing on our parts) i wanted to make a card to tuck into his bag. His friends can then just tease him about it his whole hiking trip. hehe. When i was looking for a good quote thru my quote book... i came across this and fell in love all over again from the first time i found it. It very much describes my husband and i (and any couple in love really). No one is perfect. We all have our flaws and differences. But when it boils down to it, those differences fill in each other. My husbands strengths fill my flaws and vice versa. We really are a nice pair the two of us, if i do say so myself. :)

Ok, the in depth details about the card... if you dont care about the chatter, just skip down to "the deets" and it will give you the product only low down!

I will say i was quite pleased by how things turned out! But i've gotten a little obsessed with my copic airbrush! You can make anything work for you! Love that! I really wanted some black flowers. Ironically i wanted the black flowers i saw while shopping at Michael's the other day with my friend Rachel. (check out her blog candy!). But I didnt buy them. What to do now?! So i took some orange flowers i bought in the flower department at Hobby Lobby and then airbrushed them black. It worked nicely. But they werent shimmery like the ones at Michael's. So i took my Baby's Breath Spritz and shimmerized them. You might remember i did this same thing the other day with some ivory flowers making them teal for my card. Oh how i love the airbrush!

here's a close up photo...

You'll notice too have pretty and shimmery my swirls are! I used my Quickcutz Flourish die to cut out some black paper. And then i took my Pitch Black spica pen and just colored them in. Easy as that! Very pretty outcome... no messy glitter! :)

Here's the nitty gritty for the card...


Stamps:
Digi Wordart for Paper Makeup Stamps

Paper:
Patterned Paper by Bo Bunny
Cardstock: Kraft by Neenah, Summer Sun by SU, Black by SU

Tools and Accessories:
Nesties Long Rectangle, plain and scalloped, small size
Spica pen in Pitch Black
Copic Airbrush with Black 100 marker
Fabric Flowers from Hobby Lobby
Baby's breath Spritz
Quickcutz flourish die
Black Satin Ribbon by Offray
bling by Darice

Thanks for dropping by! Come by again tomorrow because i'm participating in the Anya Birthday Blog Hop! You'll want to start at the beginning of course at the Club Anya but i might just have an extra treat for you for fun! :)

Read more...

It's a bella beach party!

>> Tuesday, July 28, 2009


Hello everyone!  I'm a little late posting this project i did last week for Funkie Munkie's Bella Club!  I wasnt able to be there at the club meeting (so sad!) but this little beach bag was super fun and easy to make, they didnt need me!  :)


First, here's the project...

The basket template i made myself.  If there is enough interest, i may post a little tutorial on how i made it.  It was very easy to put together.  
You can fill it with all kinds of beachie goodies (think suntan lotion, a pair of sunglasses, lip balm, maybe a book or magazine to read.  Wouldnt it make a fabby gift?

Here's a closer view of beachabella...


The outside of the basket can be decorated however you wish.  I kept mine very simple because the club gals can then do to it whatever they'd like.  But i think some buttons would really "make" it.  Dont you?

Here's


Stamps:
Beachabella from Stamping Bella
Sentiment also from Stamping Bella


Coloring: Copics
Skin: E0O, E21
Hair: Custom Color "E23", E25
Suit: R32, R35
beach towel: BG01, BG02, BG05
Basket: YG11, YG25, YG95

Paper:
DP by American Crafts
Cardstock by Bazzill

Tools and Accesories
Template by Moi
Brads by Bazzill
Cats Eye Chalk Ink in Tangerine

Thanks for popping in!  Leave a comment and you'll make my day!

Read more...

PMS Monday Challenge: Gettin' Sketchy!

>> Monday, July 27, 2009

Todays PMS Monday Challenge is a Sketch from Kim Stewart. I thought this sketch was super fun and i couldnt want to give it a whirl!

here's the sketch...


And here's my card from the sketch!


First I want to say that i LOVE this quote! The 2nd i came across it, i knew i wanted it to be a part of PMS. This is the type of quote that really speaks to me. A very uplifting we can be anything we want to be type. When I told Shaela the quote, she fell in love as well! She was the mastermind behind the wordart on this one and I really think she did an amazing job! Right now this is available as a digi download on the PMS site, but just a little sneakie hint, some of the digi wordarts are being rubberized for the August release. I'm just sayin'. hahaha.

For some reason, i was ALL about the glitz when i made this card! haha. I used some super fun glitter paper by Best Creations! I LOVE this stuff! I wish it didnt retail 2 bucks, but it seriously is the best glitter paper i've ever used! The glitter does not come off what so ever! So you dont get the random glitter stuck to your face! It's easy to diecut. And it just adds so much! Oh, and it comes in a LOT of colors. :)

For my wordart, i cut it out using a Spellbinder die and then left it in the die when i airbrushed it (i'm sure you've seen this all over the place, it's a pretty hot trend right now). But i do love that extra border it leaves. And it's made me want every single spellbinders die there is! haha. I also wanted a bit extra shimmer, so i spritzed on some Shimmerz Spritz in Terracotta. It gave just a subtle hint of shimmering color. Oh so fun! It was the first time i've used any colored spritz. I used the baby's breath all the time though!

For my glitter diecut, i wanted it a longer rectangle, but the die isnt that long. So i cheated! I cut the die, and then layered it underneath the paper and ribbon. It makes it look longer, when it's really not. :) I actually just layered paper on top, but it wasnt glittery. I wanted glitter! So i spread stickles all over it! I loved the look, but it still looked like something was missing. So i layered the ribbon on top of that. I would have preferred a satin ribbon, but I didnt have any in the color i wanted. So i went with grosgrain.

Now onto the flowers! Now this i was very proud of! I love the way these flowers turned out!!! They were just plain ol' ivory flowers that i pick up in the floral section of Hobby Lobby (pull them off the stems and remove the plastic center and you have perfect flowers for cards at über cheap prices! I then used my airbrush and copics again to make them match my paper! You would never be able to tell they werent that color to begin with unless you turned them over! But you can do this yourself without the airbrush, just color right over the flower with the marker. But then again, they werent sparkly! I wanted sparkle darn it! hahahaha. So i spritzed Shimmerz Spritz (in baby's breath this time) over them and let them dry. And oh the soft sparkle they have is DIVINE! Now the spritz from Shimmerz does come in a lot of colors. I didnt want to alter the perfect color i already used with the copics. But i cant wait to use a colored spritz on some ivory flowers. Wouldnt that be pretty! Oh, and now onto the brad. Again, i wanted sparkle and i love making glittery brands using embossing tinsel but darn it, i didnt have brown embossing tinsel! So instead i covered a brad in ranger glossy accents and just dunked it into some brown glitter. It worked like a charm!


Ok, here's


Stamps:
Digi Wordart from Paper Makeup Stamps

Copics (in the airbrush):
On the wordart: E30, E33
On the flowers: BG49

Papers:
Pattered Paper from Martha Stewart Pack
Glitter Paper from Best Creations
Cardstock: Bermuda Bay (SU), Colonial White (CTMH)

Tools and Accessories:
Spellbinders Labels Large
Copic Airbrush
Ivory Grosgrain ribbon from Stampin Up
Fabric Flowers from Hobby Lobby
Shimmerz Spritz: Terracotta, Baby's Breath
Stickles: Aqua (perfectly matches Bermuda Bay by the way!)


Thanks for stopping by everyone! Dont forget to check out the PMS blog to see other variations of this sketch and to upload your own creation and have a chance to win something!

Read more...

Quick and Easy Sunday

>> Sunday, July 26, 2009

Time for another lazy sunday! Actually - i plan on doing some crafting today if i'm lucky! Hubster has to work some, so i'm hoping that i may get to work on some projects! But as promised... Sunday's posts will be of quick and easy projects so you can be lazy the rest of your Sunday afternoons! :)

Today's project is tile coasters. They look stunning, but can take minutes to create! Now dont get me wrong, i've seen tile coasters that i know must have taken the creator ages! I've even made some of those myself... but not the ones i'm showing you today!

What you need:
Tiles (go to a shop store like Home Depot or Lowes and go to the tile aisle. You can buy them in singles in various styles. They usually cost between .25-.50 cents!
Staz On ink (this is important! You need a permanent ink to really stick to the tiles)
Acrylic Spray (i've done projects without it and this is ok if they are for decoration only, but if they will be used, you'll want to spray them to make sure the design doesnt get damaged)
Stamps of choice! - Swirls and decorative backgrounds look fantastic for the quick and easy. A simple swirl and then a word or quote and you're done!
Felt Feet - also optional but i highly recommend them to protect your table tops! I picked up a pack at the dollar store but you can also find them just about anywhere. I'm sure the hardware store you are buying your tiles at will have them.

Here is my quick and easy coasters...

I used the Barouque Motifs set from Stampin Up for this. Stamp the flourish from the set in 1 color (i chose black) and then the flowers from the set in an opposing color (i chose red) and then one of the words and you are suddenly done! And they'll look fantastic!

Now, Gina K made a fabulous tutorial on splitcoast on this whole technique. Her project is absolutely stunning and is a great way to see some different ways to stamp on coasters!

And thats it for my Sunday Quick and Easy post! Have a wonderfu lazy day!

Read more...

i lost...

>> Saturday, July 25, 2009

But i had fun in the process!  haha!


I'm a member of a club called TGFarmerz.  Its a club for those who love The Greeting Farm.  I am definitely a friend of the farm!  haha.  Each month at our "round up meeting" we are issued a challenge.  This past month was to use more than 1 stamp to recreate an Anya or an Ian.  I've seen MANY altered anyas and ians on the greeting farm blog and the club anya but had never really attempted it myself.  So this was my first!
All the submissions then go up on the blog anonymously and are voted on. So i didnt win... but who cares when the process is fun!
Now, a very brief background story on who i made this card for.... a friend of mine, Dawn Knight, is in the process of adopting a precious baby boy!  When she got the call she then called me to let me know she was headin' to vegas to win a baby!  Now Dawn is as fun and sassy as fun and sassy gets!  So i knew she would appreciate a vegas inspired good luck card!  :)  So this is what i came up with for her!


This process was way fun and could become very addicting!


Stamps:
For my showgirl anya, i used Flutteryby Anya (for the head), Mermaid Anya (torso and part of her hair), Chef Ian (for the trey and martini glass) and Showtime set for the legs. I drew in her fishnets with a multiliner by Copic. I also used Lucky Bunnies for the sentiment.

Coloring/Copics
Skin: E00, E21, R20
Hair: Y21, YR23, E33
Clothing & Trey: R35, R37
Cosmo: R32

Patterned Paper:
Red is Making Memories; Grey is American Crafts

Tools and Accessories
Kaisercraft bling and pearls
Thanks for stopping by! I have a very easy a quick project for ya tomorrow, so dont forget to pop back in!

Read more...

i digi scrapped again!

>> Thursday, July 23, 2009

I am on a roll! This is more scrapbooking than i'm done in ages (and thats pretty sad since that's what got me into this mad world of paper crafting!). I keep telling myself i'll scrap more, and then i wont have the pictures printed, or something, and it doesnt happen. Well, at least thats not an excuse i can have with digi scrapping!

My layout today is actually very simple. I got my digi kit for free from Digiscrap Freebies. My true reason behind doing a digi layout today was i wanted to try out one of the PMS wordart digis on a digi layout to see how it would work. To my great delight, it was easy and turned out fab! We like easy! The png file makes layering it a snap. (if you when you purchased a wordart previously and the download was not a png file but rather a jpeg file and you would prefer png, just send me an email and i'll send the other file to you!).

Whats more is that there is a FREE digi wordart up on the PMS blog today! And it's the one i used on this layout! Go check it out!

Here is my digi layout...


Thanks for stopping by!!!! Have a wonderful friday!!!!

Read more...

I digi scrapped!

I did it! My first digi scrap layout! WOohoo! I'm actually pretty pleased with how it looks. I dont think i'd ever be able to give up all my tangible scrapping items but i do think this is a neat option, especially for creating books for grandparents, etc.
Now does anyone have a good place to get 12x12 printed??? I suppose i could just print 8x8 on an 8x10 sheet and cut off the excess. Hmmmmmmm.

Here's my layout


This is a photo a friend of mine snapped the other day while our kids played at the park. They didnt even know we were trailing them. teehee. In the picture he was pointing out to her how tall the grass was! He really is his father's son!!!

I used the always and forever digi kit from www.sweetshoppedesigns.com. I first discovered sweet shoppe when they did some very generous donations at the Stampin Out Alzheimer's event a bit back. Love their stuff... just gotta get better about using the stuff i bought to try out hybrid and digi crafting!!!!! :)


So thats what i have for you today! Just a little FYI, today is Super Thursday at Paper Makeup Stamps. Every third thursday of the month there is a sale. So pop over to see what all is listed (most at 40-60% off) Have a fantastic day!!!

Read more...

EIC 45 - a bizzy little bee

>> Tuesday, July 21, 2009

It's been awhile since i've been able to participate in the EtsyInspired Challenges.  I really felt like it was time to remedy that!  So i decided to check out this week's Etsy shop, The Daily Pincushion, and my wheels began to turn immediately!!!!  There are so many ADORABLE pin cushions!  I mean, seriously?!  I dont really sew that much, (ok, at all) but these pin cushions MAKE me want to sew!  Although i'd have a hard time poking anything into one of them!  hahaha.


Here is the pincushion i decided to use as my inspiration...


Now, admittedly, i take inspiration challenges VERY literally! I think it's fun to try to take something NON card, and turn it into a card. And i usually try to do it in a manner that really turns that object INTO a card. So it's a little more of a copy than just an inspiration, but that extra challenge to really do that, is fun to me. :)

Here's the card i came up with...

Pretty close, huh?  I did have a lot of fun with it!  I took a scrap of Tangerine Tango cardstock and ran it thru the cuttlebug to emboss (swirls folder).  Then i used an EK success punch to punch out the flower.  The vine/stem of the flower used my new quickcutz flourish die (that i HAD to get because my girl Dawn always uses swirls to embellish her cards and i LOVE them).

I stamped the bee from Buggy Sayings (PMS) onto solar white cardstock by Neenah and cut him out.  I also stamped him directly onto the cardstock base i'd be putting him on so i wouldnt have to cut out his legs!  :)  He was colored in with copics.

The bee trail was just doodled on with a pen.  Here's a couple of extra views... sorry the close up of the bee is so dark!  I was trying to get the sparkles!


and now...


Stamps:
Buggy Sayings from Paper Makeup Stamps

Coloring/Copics
Bee: Y13, Y15, Y18, N4, N6

Paper:
Tangerine Tango, Blue Bazzill (already textured with the dots) not positive on the name of the color, sorry, Sunflower CTMH, Solar White Neenah

Tools and Accessories
Cuttlebug Swirls Embossing Folder
Black CTMH marker for doodling
Creative Memories Custom Cutting System circle template
Quickcutz Flourishes die
Creative Cafe Glitter Glue in Spirit White
Green Button from Creative Cafe
Yellow DMC floss

Thanks for dropping by today!!!!  Feel free to leave some love.  hehe.

Read more...

You're the BOMB baby!

>> Monday, July 20, 2009

Here's another secret sister project i made! But i did a double whammy and participated in the Bombshell challenge going on over at Paper Craft Planet sponsored by Bombshell Stamps

To play along, simply pick something that you think is "the bomb" and make something! That's it!

My latest craze and obsession is creating my own copic colors. Yep, you heard me right! Its so simple and easy to do! You simply buy an empty sketch marker, and refill it with whatever blend of various ink refills you want. Easy Peasy. you can mix drops of the reinkers in a small dish to figure out the ratio you need. I then do it by alternatively doing drops in the empty. So for example, say i wanted an even mix between 2 colors, i'll do 5 drops of color choice 1, then 5 drops of color choice 2, then back to 1, back to 2, yada yada yada. Now granted copic has 344 colors now so i should NEEEEEEED to mix my own colors. But it's just plain fun!

So since i do this this process it "the bomb" and i think my secret sister is "the bomb", this was an easy combination to make! I used my new Hawaiian Girl stamp set (i LOVE this set! There are so many pieces that you can layer to create a scene, or pull apart... so fun!). And i decided my little island girl needed to have some beautiful "chocolate" skin like my girl, Stephanie (my secret sister who can now be named!). Stephanie has asked me before that color i liked to use for "chocolate" skin as she puts it, and i kinda came up empty handed! I would use E33 and E35, but the color was a smidgen to the red side. E25 is a gorgeous color for dark african american skin, but too dark for what she and I would both be looking for. And the next color in the E25 family was E21! Way too light! Then i had an idea! Why not make a color inbetween!!!!!! So i got an empty, and used my E21 and E25 reinkers in equal portions to create an "E23" blend. It's perfect!

Here's is my Hawaiian girl card!


I was pretty stoked with how everything turned out, even though the card layout is fairly simple! I also made a copy of this color for my Secret Sister to go along with her card! :)


Stamps
Hawaiian Girl by Bombshell Stamps


Coloring with Copics
Skin: Custom Color "E23", E25
Hair: W7, W8, W9
Bikini Top: R24, R27, R29
Skirt: G21, G24 with G20 to blend
Ukuele: E31, E55, E30
Lei: misc colors i just grabbed here and there with no rhyme or reason!!!!
Hybiscus: Y000, Y21, YR16

Paper:
Patterned Paper by Tinkering Ink
Cardstock Base: Tangering Tango (Stampin Up), cardstock mats by bazzill (vibrant blue, beeswax, candy apple)


Tools and Accessories:
Hemp string
Misc brown button
flowers from silk flower department at Hobby Lobby
Pearl accents by Martha Stewart


If you play along in the challenge, be sure to tag your photos with "PCPBOMB". The prize includes TWO stamps sets -- Pinstriping and Speed Shop.
Don't forget that today is Monday as well so there is a new challenge over on the PMS blog. See if you can find my card! :)

Read more...

Sunday Quick and Easy!

>> Sunday, July 19, 2009

So sunday's are days about spending time with family, worship, fellowship, good times. I've decided (we'll see how long this lasts! ha!) to post a quick and easy project on sundays. Not every project I will have actually created on a sunday, but the idea is that the project will be something easy to put together so if you should feel like crafting on a sunday, you could do this and still have time to spend with family!

Here's my first Quick and Easy project...

A bulletin board! I actually altered this already pretty sleek looking bulletin board for my Secret Sister. She's gotten the gifts now and knows who i am so i'm not spoiling anything!

Here's an overview of the board...


This project (i thought) was a terrific idea because my SS is a principal at a middle school, so she has an office. However, she is fun and sassy and deserved a bulletin board that matched her very fun personality! Not just the average i bought this to stick stuff to bulletin board. Thats just not her!

So i bought this multipurpose board at Michael's. It was half dry erase for notes, and half cork. Now it was time to personalize it! Easy!

My SS's favorite colors are "black and red and white together forever!" So I took that thought and ran with it!


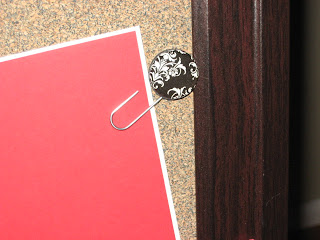
First i found these adorable paper clips at walmart. I knew they would make a great addition. I used really strong permanent adhesive to mount the clips to the board in various places. To give her an idea, i created some simple photo mats. She can either use those mats and use photos, on her board, or she can remove the photomats and clip in whatever she'd like.

Next I altered some plain white buttons using rubons just to give them an extra flair. These buttons i then sewed onto some fabric flowers. The larger flowers where adhered to the corner of the board as a decoration. 2 Smaller buttons were also altered with rubons and then adhered to the tops of magnets (that came with the board but were just plain! no fun!). The dry erase side of the board is magnetic!

I didnt take a closer pictures of some of the other details, but i did add some bling rhinestones to the corners of the board, etc.

All in all, i think this project took me about 15 minutes! But it still made a cute and easy gift that means a lot more than just a storebought gift. I made a bulletin board around christmas time for my Brother-in-Law and used rubons on the frame to put his name, and made more masculine clips, etc. No flowers or bling on his. haha. but you can see how easy it is to adapt it to the person you are creating it for!

Thanks for dropping by today!

Read more...

A Cupcake for Dawn!

>> Friday, July 17, 2009

My dear friend, Dawn, just celebrated a birthday.  I made this card for her.  With all intentions of getting it up on my blog FOR her birthday.  But it was during my slight leave of absense.  hahahaha.  I also used the monday mojo sketch from this week!


Here is my card...


I used the Sprinkles and Cherries set from Paper Makeup Stamps. This set is fun because it's like a buildable cupcake. I added the cherry AND the sprinkles (or they could be chocolate chips which is what i decided when i stamped them in brown). But there is also a candle you can put in there. There are a few sentiments with interchangeable words. All in all, just a fun set to mix up.

I paperpieced my cupcake top with with of the retired DP from Stampin Up called Candy Lane. (The bottom of my cupcake is colored with Copics). I still like to add a little bit of shading when i do paperpiecing, especially on larger pieces. So i took my T1 grey copic marker and just did a little bit on the cupcake. It helps make it stand out, i think! The cherry was stamped on top but also stamped onto neenah white cardstock and cut out and glued on top.

Ok... onto...


Stamps:
Sprinkles and Cherries set from Paper Makeup Stamps

Coloring with Copics:
Cupcake Base: R000, R00, R30
Cherry: R24, R27
Shading T1

Paper:
Patterned Paper: Candy lane by Stampin Up
Cardstock: Close to Cocoa (SU), Sweet Blush (PTI), Maraschino (Bazzill), Solar White (Neenah)

Tools and Accessories
Ribbon from AC Moore


And just a quick shout out to my friend Robby before i go! He's been working hard to run in the NYC marathon! I'm very proud of him! He has been working hard to raise the money needed to secure his spot in the race. He is currently being trained by The Leukemia & Lymphoma Society and all the money goes directly to them. I'm not asking you to donate (i know times are tough!) but if this is cause you support, and you dont have someone you already sponsor, would you consider helping my friend reach his goal? Secure donations can be made HERE. I'm not asking you to donate (i know times are tough!) but if this is cause you support, and you dont have someone you already sponsor, would you consider helping my friend reach his goal? He only has to get to $950 to secure his spot. :)

Ok, that is all! :)

Read more...

And i'm BACK!

>> Thursday, July 16, 2009

I'm BACK! Actually, i've been back for a few days, but then i left town again (for the day only). Few, a lot of out of town trips sure does make you feel behind!!! I've also been hard at work on the new plate design for PMS. :) Which is fun, just time consuming! And working on secret sister projects which i can ALMOST show you since the reveal has been made, but I'm pretty sure my sis hasnt been Funkie Munkie yet to pick up her stuff, so i'm not going to blow my cover just yet!

So instead I have this super simple and easy birthday project! The surprise might be spoiled for the recipients mom, but since she ony just turned 5, i dont think she checks my blog out much! haha.

This is just a super fun thing you can do with digi stamps (from any company). We do this often in my house for my own 3 year old. Its nice to give him the same images Mama is coloring. :) What i did was to enlarge each digital image to be the size of an 8.5 x 11 sheet of paper and then printed them all out. used the bind it all to put them together and decorated the cover in her favorite colors! Instant present... instant fun. Hopefully she'll color away so her mom (a very good friend of mine) can scrap! :)

Here is the project...


The cover of the book is actually 8.5 x 12. I didnt want the corners of the coloring pages to get too buggered. Plus the edges of the scrapbook paper i used for the cover were too pretty to hack off! haha.
The Fairy on the front has also been enlarged and cut out after coloring. I had to make her the appropriate size for the cover!

Here's


Stamps:
Digi Stamps from Paper Makeup Stamps

Coloring: Copic Markers
Skin: E00, E21, E000

Hair: Y21, "Y20 - custom color", YR23
Skirt: R81, R83, R85
Jacket, shorts, boots: E53, E31, E55, E57

Patterned Paper
Best Creation

Tools and Accessories
Cricut, Alphalicious Cartridge
flowers from hobby lobby (bought in the flower section, i just removed them from the stems!)
bling from the dollar spot at target!

Read more...

Quick post!

>> Saturday, July 11, 2009

I'm doing an emergency out of town trip this evening to be with a friend in need... so this post is going up super quick style!


This was something i created just for fun this morning ironically. I'm going to take it to my friend tonight, because i think she will really appreciate it. :)

I used one of the new PMS digi downloads. I love that you can print these babies at any size to fit your needs!!!! This wall plaque is 8.x 11. :)


Check out all of the new digi wordart downloads HERE

Read more...

Hip Hop Hangover!

>> Friday, July 10, 2009

Its a Hip Hop Hangover friday for me! Sorry i didnt post yesterday. The boys have needed some "mama time" since i've been so busy! I took them to Monkey Joes (a big inflatable bounce place) and we played and played!

I was able to sneak in and out of Unity's Hip Hop yesterday. I adore Unity and have been a huge fan for over a year. I placed my first order with from for my birthday (but for my birthday) last year, and since i just hit that mark, i guess i had a birthday with them too!!! Sadly i havent used Unity as much lately. Still trying to find that balance between my own stamp co (which of course i love) but then the other stamp companies (like Unity) that i just love too!

Ok, enough of that though... let's get onto the card!


I wanted to make a card for my girl Christi to thank her for her friendship. This girl LOOOOOOVES cherries, so when the Unity Kit of the Month in June was released, i was ecstatic for the kit to have some cherries in it! What was even better was the sentiment used one of my very favorite fonts?! Recognize it? It's all over my blog! haha.

One of the Hip Hop challenges yesterday was to create a black and white background in any manner we wanted. Other colors were permitted for the rest of the card. So i stamped the cherries randomly over a black piece of cardstock with white daisy craft ink from Close To My Heart. The strip of cherries was stamped with memento ink and then colored with copics. For those that follow my copic tutorials or take my classes, i used the "leaving white space/like paint on a wall" technique. :) Basically, you draw out the space you want to leave the lightest shade and leave it white. You complete your shading and then go over the entire thing with your lightest color. Where it was left "white" or with no color at all, will be the lightest even when some of the color you are layering is the same as the marker you are using. Like paint on a wall, 1 coat, it's there, but it takes a 2nd coat to make it its true color. I have a tutorial (using UNity!) here if you are interested. The base of the leaf i used a simple "flick" method to add some extra shading in addition to the previously mentioned technique.

Quick closeup view...


Here's


Stamps:
All from June KOTM from Unity Stamp Company


Copics/Coloring
Cherries: R24, R27, R29, white gel pen
Stems/Leaves: YG21, YG23, YG25
Outline: T0

Paper:
Cardstock is Basic Black, Real Red, Kiwi Kiss all from Stampin Up; White is Solar White from Neenah

Tools and Accessories
Ocean ink from CTMH sponged onto edges
Red Bling from Studio G


Thanks for stopping by!!!!!

Read more...

Blog Comment Winner

>> Wednesday, July 8, 2009

Sorry i have nothing crafty to post today (somehow i thought i was actually going to get one of the PMS release party challenges done... BWAHAHAHAHAHA! Thats me laughing my myself for that one!) But It was a ton of fun last night at the release party! Now these week i get to go back to some of my other neglected stamps. :D It's my rule after a PMS release.

BUT i do have a winner from my blog comment candy from the blog hop yesterday!

Random.org selected comment number 20 which was

LeAnne said...
Ohhhhh, Ahhhhh!!!! I am loving these great digi sentiments!


Yippie Skippie! Leanne, i actually dont have your email addie, so if you could email me at makeupbykatie @ yahoo that would be fantastic! I'll get your digis to ya!

Read more...

PMS blog hop and a mojo challenge!

>> Tuesday, July 7, 2009

Hello!  It's time for the PMS blog hop!  The release is tonight at 9pm and i am so silly excited about it!


Now if you're hopping here from Dawn Wheeler's blog... you're right on track!  If not... you need to start back at the beginning!  I wouldnt want you to miss out on all the new release fun, prizes or the discount code!  :)

I'll spare you my whole reasoning on why you may like digi since i wrote it all out on the PMS blog too!  :)  And we'll just get straight down to business with the blog hop!

I have a few different projects for you, all to show you the different fun ways to use digis!

My first card, if my favorite way to use word art digis!  A nice solid print, and using it as a main focus.  I am hopefully in love with quotes, so being able to really give them attention is a great fun thing for me!  I printed this quote onto Neenah cardstock, cut it out with my nestabilties die and then airbrushed over it for affect.  The layout is based on this weeks Mojo Monday sketch.


I love this paper line by scribble scrabble!  Their paper is nice an thick, and super cute designs on either side!  This particular collection is called Felicity.  But it looks like all of their lines are über cute.  Now if only i could remember where i bought this!!!!!  Because i can tell i'm gonna need more!


My 2nd card is my next most common way to use word art.  Just as a sentiment to go along perfect with an image.  So this is nice when you can scale down the size so it prints small to not take away the focus from your image!  This card was actually also made with my friend Kim, in mind.  She just became a gramma for the first time and I've been wanting to get a card out to her.  You truly never can understand this sentiment until you have a child or some small being you call your own (furbabies can count).  The mass of love in my heart for my children is so large i feel like my heart will burst just thinking about it!    But this sentiment would also work great for a thank you card!  Think of those little things people do for you that mean so much!


read below in "the deets" for all the nitty gritty.


And last but not least... this is a new way of using a word art digi but oh my gosh can i tell i'll do this more!  Now you rarely, if EVER, buy a quote stamp thats larger than a background stamp right?  I mean, would you have enough use for a quote stamp that large?  Well, with digis you can make it that large if you need!  Enlarging the quote to such a size would also work great on a scrapbook layout.  This helps to make quick gifts too!


Now if you dont care about the nitty gritty details, thats ok, but you need to scroll down to the bottom of the post to see how you can enter to win these digi images, to get your letter for your 15% off coupon code and to see who you hop to next!

Here's


Card 1
Stamps:
A Little Faith Digi Stamp from Paper Makeup Stamps

Paper:
Felicity collection from Scribble Scrabble
Cardstock is Bazzill ( Maraschino and Lagoon)

Tools and Accessories
Flowers from the floral section of Hobby Lobby
Brad is by Bazzill Basics in Lagoon
Spiral Clip from Spare Parts
Ribbon from Spool O Ribbon
Cats Eye Chalk ink in Chestnut Roan
Copic Airbrush: Using E11 and E00

Card 2
Stamps: Digi Stamps from Paper Makeup Stamps, to be released tonight at 9 pm!
A Fairy for Kayleigh (previously released)
I Never Knew... sentiment

Coloring/Copics
Hair: E25, E27, baby hair is YR21, Y21
Skin: E00, E21, E000 and R20 (cheeks)
Shirt is BV00, BV02, BV31
Baby Blanket: R20, R21, R22
Wings: B00, Colorless Blender

Paper:
Blue PP is by American Crafts; Pink PP is by Martha Stewart Crafts
Cardstock is Georgia Pacific for the white and Chocolate Brown by The Paper Studio, and Pink Pirouette from Stampin Up

Tools and Accessories
Border Bling by Heidi Swapp
Circle Custom Cutting System by Creative Memories
Cats Eye Chalk Ink in Iced Blue and Rouge
Brown Satin Ribbon from Walmart


Ok, if you've made it this far (i'm proud of you, i know i'm wordy!) you can enter yourself to win these digis for free! Just leave a comment on this post!

And i bet you want your letter for the code, huh? Well my letter for you is C! Now hop along to Lisa Kind's blog so you dont miss her amazing creations and to enter yourself to win MORE and to get yourself the next letter!!!!

Read more...

PMS Kitty Challenge with a sneak!

>> Monday, July 6, 2009

So it's Monday which means a new paper makeup stamps challenge!  THis week Meli inspired us to use anything from this picture....


We could use any part of this image as our inspiration. Since PMS doesnt any kitty images, i went with the flowers and colors. Then i realized, Well PMS doesnt have much by the way of flowers either! That needs to be fixed. haha. I guess it's still a new company so the other stamps will come in time. :)

But i still used floral paper! :) And a new sentiment that will be released soon! :) It will even be available as a digi on July 7th! WOOHOO!

I made this little basket using Lauren Meaders Pack a Picnic template from PTI's Timeless Templates. This is my favorite template to date! IT was so easy! And it comes in 2 sizes so you can either make baskets that coordinate, or just choose which size basket it the most appropriate for your project! I chose the small basket because i was making it to hold lots of paper flowers to give to a friend who makes cards and sells them on Etsy so she would need lotsa flowers!

Here's my basket...


I was really happy with how it came out and how easy it was to put it all together. But since i was giving it as a birthday present, now i needed a card! I've also been dying to play with my new copic airbrush more, so i created this card and airbrushed the flower to match my paper!


Here are


Stamps:
If Friends were flowers digi sentiment from Paper Makeup Stamps to be released July 7th
Birthday Wishes sentiment from Paper Makeup Stamps

Copic Airbrush Colors
R81, YR00, YR12

Paper:
Patterned Paper is Magnolia from the Just Dreamy collection
Cardstock is Chocolate Chip from Stampin Up

Tools and Accessories
Pack A Picnic Timeless Template by Lauren Meader for PaperTrey Ink
Copic Airbrush
Paper Gerbera Daisy by Bazzill in Vanilla
Pearls by KaiserCraft in Champagne
Ribbon is Twill ribbon from Papertrey Ink in Summer Sunrise
Button is from Creative Cafe
Brads are from neautrals pack from Paper Studio
Cat's Eye Chalk ink in Chestnut Roan and Amber Clay


Don't forget to check out the other design team's fabulous creations on the PMS blog
and to link up your creation to Mr. Linky!  Check back tomorrow for the final PMS sneak peek and the release party tomorrow night going live at 9pm EST!

Read more...

Paper Makeup Stamps Sneak Peek day 4

>> Sunday, July 5, 2009

So it's day 4 of the Paper Makeup Stamps sneak peek and I am more than ecstatic to preview this set! This is a set i've been just aching to do and when i mentioned some of the quotes to Shaela she LOVED the idea and she even had couple of quotes of her own (literally!, one is her quote!) So she whipped up some word art lickety split and the set started to come to life! She even drew me a rainbow and clouds, something i wanted anyway but hadnt even told her! We're so n'sync! hahahaha. So all i really needed to do was draw a little umbrella and the set was done! Spectacular!

The set includes 4 word art quotes plus a rainbow with clouds image, 2 separate clouds and an umbrella. In this digi set, 1 of the wordart quotes and been tucked neatly inside the rainbow. Lots of possibilities with all uplifting rainfilled quotes! I LOVE THIS SET!

Here's my card... perfect for a rainy day!


I did the layering in photoshop with the quote, umbrella and clouds and then just printed it out. SO easy! Then i filled in the clouds with liquid applique and puffed it up with my heat gun. I didnt even wait for it to dry! I wanted the inconsistency! Then i created a little negative mask and used my copic airbrush to make my puffy clouds not so unrainy day looking! haha. They turned out just like i had envisioned!

My umbrella i colored in with copics and then used the colorless blender to create polkadots (or raindrops, which ever you think they look more like!) Some light copic colors highlight the words in the quote. Then some layers and i was done! LOVE those cards!

here's some close up views of those clouds (i'm kinda proud of them, can ya tell?)


Here's the


Stamps:
Digi set, raindrops and rainbows from paper Makeup Stamps (to be released July 7th)

Copics:
BG32, BG34, Colorless belnder
word highlights bg000, y000, rv000
airbrush color in C3

Paper:
Martha Stewart Patterned Paper
Basic Grey cardstock from Stampin Up, and Bermuda Bay cardstock from Stampin Up

Tools and Accessories
cuddlebug folder swiss dots
kaisercraft pearls in pewter
aqua satin ribbon from walmart
liquid applique in white
copic airbrush


Dont forget to check out the PMS blog to see the other design teams AMAZING creations!!!!!

Read more...

Paper Makeup Stamps Sneak Peek day 3

>> Saturday, July 4, 2009

happy 4th of July everyone!!!!! I'm so excited about the next release of monsters! They are just everything i would want in a monster! hahaha! Steve (my friend who designs the cute tough guys) has seriously outdone himself this time! And a little sidenote... steve has some little short film animations (you can see a few on his website) and my 3 year old and become obsessed with them. He wants to watch them allllllll the time!

Ok, here's my monster sneak peek card for you!


Isnt he fun! I decided to name him Calder (which means rough water).And i just think he's the cutest thing i've ever seen! My son totally gets that look when he is about to jump in the pool (and then he remembers he loves water!)

Here are


Stamps:
Digi Calder from Paper Makeup Stamps digi line (to be released July 7th)
Sentiment to also be released by Paper Makeup Stamps digi line

Coloring: (markers listed in the order used)
Using Copics
Body: B12, B14, B16
Water Wings: Y15, Y19, Y13, R27
Flippers: G12, G14, G20
Eyes: E99, YR15, T1

Paper:
Patterned Paper is Lime Rickey by Basic Grey
Cardstock is Bazzill

Tools and Accessories
Cat's Eye Chalk ink in Iced Jade
Brads by American Crafts in Carrot


and just because i couldnt resist these pictures i took of "baby" gabe yesterday.... I cant believe how big he's getting! And running all over the place at 9 months!


Read more...
Related Posts with Thumbnails

Top Blog Sites

Blog Archive

Listen to makeupartistkaties playlist


Get a playlist! Standalone player Get Ringtones

  © Blogger template Webnolia by Ourblogtemplates.com 2009

Back to TOP