Back in Action!

>> Sunday, January 31, 2010

Well I came home from our sweet little getaway to a winter ice storm!!!!
I'm not kidding! The day we got back it starting sleeting and ice-ing everywhere! It didnt help matters that i had a wedding to do makeup and hair for the next morning (which was yesterday).
They didnt call the wedding off which meant very very scary driving conditions for me! I woke up at 5:00 and left at 5:30 to drive someplace that should take me 10 minutes and it took 40! Then we went from that location to another and it should have taken 20 and it took over an hour! it was BAD! But luckily, everyone was ready on time and looked wonderful (if i do say so myself!, ok, they were very pretty girls to begin with, but i still was proud! haha! Once i have pictures i'll post em over on the makeup blog)

I have been hard at work getting ready for 2 big events... the My Time Made Easy release which is TOMORROW and the PMS birthday party that starts on the 2nd! This is going to be a busy week! But i hope you are ready for the fun because it's definitely going to be fun!

So stay tuned! My first post for My Time Made Easy will be up at midnight!!!!

Read more...

My Time Made Easy GIVEAWAY!

>> Friday, January 29, 2010

Scroll down for my Makeup 4 the Weekend Challenge post!!!

Are you wanting to win the next release from My Time Made easy?! It's valued at $108.50
There are super cute new papers! AWESOME stamps! Stunning and über cute templates!
Lauren even has a sneakie peekie on her blog! Go check it out HERE!

All you have to do is leave a comment on Lauren's Blog!

Stay tuned as we all have some fun and fabulous samples starting on the 1st!

Read more...

Makeup 4 the Weekend Challenge - M4TW14


Woohoo! I did it! I actually got something done for the PMS Makeup 4 the Weekend challenge!
I wasnt sure it was going to happen! But after walking along the beach for a couple hours and then going up and down the boardwalk at least 4 times (it's a long boardwalk!) my kids were POOPED! I think Gabe might have taken the longest nap he has ever taken! I'm not sure what i'm in for tonight! haha! So, while the kiddos were down, i took the time to play a little with a digi scrapbook layout!

First, let me do the spiel.... every friday a different PMS Makeup Artist (thats a design team member!) issues a makeup 4 the Weekend challenge on the PMS blog. Christi (what would i do without her) arranges everything and posts her creation along with the challenger! So you just simply have to go to the PMS blog to check them out! And to see who else is playing this week!
This is also where you can link up your project and then next thursday, Tangii will show you a showoff of everyone's cards! Super fun!

This week our Challenger was Christi Snow. She gave us a fabulous inspiration challenge from a photo she found in the Pottery Barn catalog...

Here is the inspiration photo...


Isnt that gorgeous! I wish i could have a fun bedroom like that! My hubby pretty much kabooshes any idea of fun or frilly things in the bedroom. It's pretty simple and slightly manly in there (minus the man smell, thats where i take over! haha!)

Well, being in a bit of a limited supply... i decided to work on a digi scrapbook page! I think digi scrapping is fun, i just dont know how good i am at it! That paired with the fact that i take inspiration challenges entirely too literally (ok, sometimes i think thats just a fun way to make it even more challenging)... here is the digi layout i came up with!


Ok, so admittedly there isnt a whole lot of PMS on there, but the sentiment at the top is one of the wordarts that PMS offers as both a rubber stamp (in the Friendly Flowers set) and as a single digi wordart... just for the digi scrappers who love the PMS wordart style and want to use them on their digi layouts! You can of course buy a digi version and print out the wordart as well. :)

The blue polka dot paper came from the Alphabet Soup kit by Melissa Bennett at Sweet Shoppe Designs. I had thought i'd use a little more of the kit, but i ended up created most of the rest of the layout in photoshop (including the black and white polka dot... i was very impressed with myself!) The red ribbon at the top is all Melissa, but the rest of the layout (flowers too) is my own. :)

So thats what i have for ya today! Perhaps on a day with a wee bit more time i'll show you the super easy way to create brads and things in a digi layout. That way you will always be able to adorn your digi layout pages with the exact colors in the layout even if you dont have them in the digi kit!

Have a wonderful day everyone!!!!

Read more...

Getting a little R & R

>> Thursday, January 28, 2010


Sorry, i did not drop off the face of the planet! With my recent crazy crafting escapade plus the January release from Paper Makeup Stamps just before that, my hubby decided the family needed a little R & R! Or moreso, that he wanted to go fishing. hahahaha!

So we are at the beach! (My hubby likes to "surf fish"). My in laws are staying in charleston for the cold winter months (they live in Ontario) so we had a beautiful beach condo to stay at for a few days! We left yesterday after jack got out of school and will be heading back home tomorrow, but i just had to do a quick post of the gorgeous view that i get to look at all day today from the balcony of the condo.


Its even better in person, this picture is just from my cell phone!

The weather is supposed to by 66º today so it should be just warm enough (to me) to walk along the beach for a bit! :) I cant wait to get some shells! And i'm sure the boys will love it, so long as i can keep them out of the ocean!

We'll be heading back inland tomorrow, but I'm not sure if i'll have the time/motivation to work on my Makeup 4 the weekend challenge post for tomorrow! hehe. I also have a wedding to do makeup and hair for on saturday, so if you dont see a post until sunday or monday, dont be worried about me!!! :)

Have a wonderful day!!!

Read more...

A little verve for you...

>> Tuesday, January 26, 2010


Is it really tuesday already?! Where does the time go!
Well, I have been hard at work getting some samples made up for you, which of course since they cant be posted yet, always drives me bonkers!

I did realize however that I have a Viva La Verve card that was never posted here on my blog!
I made the card for a friend who i didnt want to see the card, and then i kinda forgot about it!
Whoopsie! Well, at least that means i have something to show you today!

Here's my card...


If you have never played along with the Viva La Verve challenges on splitcoast, Amber gives you a sketch and then a twist! To go along with this sketch, her challenge was a 1, 2 3 challenge, i cant firmly remember the 1 (it may have been 1 thickness of additional cardstock other than the image??), 2 cardstock colors in addition to your neutral and then 3 stamps. It was a fun CHALLENGE thats for sure!

Ok, off to pick the kiddo up from school!!!

Thanks for stopping by today!

Read more...

Do you want a sneaky peaky of My Time Made Easy february release?

>> Saturday, January 23, 2010


Oh i am SO excited!

My Time Made Easy is sponsoring the JUGS challenge this week!
There is something exciting for YOU too! If you play along this week in the JUGS Challenge, link up your creation and you could win a $25 gift certificate to My Time Made Easy!
And the JUGS girls get to sneak peek some of the February template and stamp releases!
BUT, i was told that i could play too! YIPPIEEEE! I think sneakie peekies can be so much fun!
Ok, perhaps its more fun when you get to SHOW the sneak peeks that when you have to just pine after what you cant have. HAHAHA! Well you can have these soon! February 1st soon!
There is some super cute stuff being released, but i'm going to keep my mouth shut except to announce...

Pretty Packing Template... Happy Mail
Pretty Impressions (acrylic AND digital stamps) Critters with Heart
Pretty Printables Love Notes Paper Collection

After having to remake my cute little mailbox thanks to a certain little 16 month old... remember the one i shushed with juice the other day... hehe... well, i made the HUGE mistake of running

Here is my project (for an unnamed friend, but it is going somewhere!)


This little mailbox was so much fun to make... that i made it twice! Truly i did. Ok, so not by choice. I did a bad thing... i left the room to get a drink.... with my 16 month old in the same room with my precious mailbox! Well, needless to say it wasnt in 1 piece when i came back in!
Good thing the templates are super easy to assemble and my cricut did most of the work for me!
The stamp set Critters with Heart is just so full of pun fun! Each cute image has a sentiment (or 2) that works so well with it!

I decided to take the pun fun to another level... see that sentiment! Well what do crafters like to stick on everything?

Answer: A whole lotta bling! Yes that is a lot of bling put in that mailbox! To my glee, it fit PERFECTLY! I picked these up in the after christmas special at Michael's so i was able to get quite a few packs! I have a friend who has added a lot of sparkle to my life, so i thought she deserved some sparkle of her own. So this will be sent out to her!

Now the little flap hanging down with the magnet isnt actually a part of the template. Once i did cram all that bling in there, the lid didnt want to stay shut tight, it hinged open a smidgen. So i just fashioned a little hinge out of a scrap of cardstock and added some bazzill magnetic snaps to it. :) Easy peasy!


Here are a couple shots of my card...


The krafty background here was created using paper (that i'm going to talk about in just a second!) and the same sentiment used before only stamped randomly with versamark ink.

Now i gotta talk a bit to you about this paper!
MTME is coming out with 3 new collections of pretty printables paper! The hearts you see on both the Happy Mail mailbox and on my card is just 1 of the delicious patterns in these collections!
But wait... it gets better! Couture Cardstock is matching the MTME digi paper to their cardstocks! SO if you are someone who loves to have matching cardstock to your patterned paper, we have your answer!

All the cardstock you see in my projects today is from Couture Cardstock. Here i used
Brown Paper Packaging
Candied Apple
Silent Night

The 3 cardstocks i chose all have various textures which i think is very fun on a project! All of them are definitely sturdy enough to hold up this project!


Stamps from My Time Made Easy, february release
Critters with Heart


Tools:
Pretty Packaging Template, Happy Mail (My Time Made Easy february release)
Cricut Expression
Sure Cuts A Lot
Nestabilities Standard Circle and Scalloped Circle

Paper:
Pretty Printable Paper, Love Notes (My Time Made Easy february release)
Cardstock:
Couture Cardstock, Brown Paper Packaging, Candied Apple, Silent Night

Accessories:
1/8 inch ribbon, offray
brads (giftie... no idea what brand they are! sorry! :) )
Bling (inside and out!) Studio G
Thin Hemp
Bazzill Magnetic Snaps

Ink: Versafine Majestic Blue

Read more...

Makeup 4 the Weekend Challenge - M4TW13

>> Friday, January 22, 2010


It's time for another Makeup4theWeekend challenge from Paper Makeup Stamps!
This week it was Amber's turn to get your juices flowing with this fabulous sketch...


In a stamping group i'm in, the stamplicious yahoo group, our feburary homepage contest is any valentine's day card! So i'm doing a bit of a combo!
I decided to use one of the new releases from PMS... isabella. I think she's one of my new favorite fairies. Yes i'm aware i say that every month!

Here is my take on the sketch... um, ok so my "take" is usually pretty straight forward to the sketch! Less thinking that way! :)


If you read yesterday's post, you'll remember i'm playing with a new coloring technique (new to me) of doing high contrast. Leaving the center mostly uncolored or with an extremely pale color and using a much darker color in the recesses of the image. Hence the words, high contrast. haha. This is what i'm working on with my students in the Copic Club i help to run at Funkie Munkie Scraps.

Here is a detailed color shot...


Remember you can scroll down to "the deets" to read the colors used for this image. You can also double click any of the images to open them larger and reeeeeally see the detail. :)

Here's a few other detail shots... i'll keep them smaller cause you may not care, but you can still double click em to open them larger!


You might have almost missed my sentiment. It's reeeeeally small! Ok, it's not THAT small. it's about an inch. Are you puzzled at where that came from? It's actually just a portion of the Made with Love By stamp thats comes in the mini made with love set. I simply used a marker to make sure only the words i wanted were inked up and then cut it out with the smallest circle in the nestie set. A punch would have probably been easier. hahaha.

If you want to play along in the challenge, go on over to Paper Makeup Stamps and link up your card! And remember if you are uploading to a public gallery to use the keywords PMS, Paper Makeup Stamps and M4TW13!


Stamps from Paper Makeup Stamps

Inspiration

Coloring with Copics
Dress R00, R20, R21, R24, colorless blender
Skin E00, E000,
Hair: E30, E33, E37
Wings B000

Paper:
Patterned Paper (How do i love thee) from Moxxie
Cardstock by bazzill (ruby red and um... i think it was kisses, but it was scraps!)
Solar White by Neenah

Tools and Accessories
Labels 1 nestie die from Spellbinders
Standard Circle nestie from spellbinders
stitched ribbon from Offray
Paper Flowers from Prima Marketing
Brads by Bazzill
Rhinestones from Studio G


Read more...

You're the cat's meow!

>> Thursday, January 21, 2010


Here is a card i made this afternoon for my Copic Club i teach at Funkie Munkie Scraps.
I dont always make cards out of the pictures we color in the class. Not sure why, i think i forget!

Well this month we are focusing on a different overall look to the colored image. High contrast!
This is leaves the center not colored and then uses the colorless blender to fade out from the center. I'm not going to lie to you... this coloring style frightened me a little! Haha. Well, trying it didnt, but thinking that i would be teaching it did! I love the look when i see others do it, so i just had to play and find my rhythm with it! I'm always looking for ways to go outside of my comfort zone artisically. Whether its stamping, coloring or doing makeup. Expanding your comfort zone makes you a better artist!

Ok, stepping off of my soap box now...

Here is my first card using this new to me coloring style...


I love this stamp image from The Greeting Farm. I've had this set for entirely too long without inking it up! I think they are called gingerbells but for the life of me I cant find them on the website to link them up! Sorry about that!

Here are a few details shots...


I used my copic airbrush inside a nestie to get this look. I do this a lot, but i dont usually use a "bolder" color inside the nestie. I'm kinda diggin' the different effect and how much whiter the ring is!


I would really like to work on the "smoothness" quality of my coloring in this style. Other than that, i think it's a lot of fun! As with any new technique, you gotta practice. Thats what i always tell both my makeup and coloring students. I just dont like it when the rule has to apply to me too! hahahaha!


My card for you tomorrow is for the Makeup for the Weekend challenge and it's also a card i'm showing tonight in class! So if you are interested in seeing more from this technique, be sure to tune in tomorrow!


Stamps:
The Greeting Farm; gingerbells

Coloring with Copics
Colors used.... YR000, YR12, YR15, YR18, R20 and a LOT of colorless blender

Paper:
Cardstock: Pacific Point (SU_, Tangerine Tango (SU), Solar White (Neenah)
Patterned Paper: Pacific Point designer paper (SU)

Tools and Accessories:
Spellbinder Nestabilities Standard Ovals and Scalloped Ovals
Dots and Dashes ribbon (picked up at Michael's)
Studio G Rhinestones
The Paper Studio brads


Thanks so much for stopping by today!

Read more...

This bella is a flutter for you!

>> Wednesday, January 20, 2010

Ok, so this was totally supposed to post yesterday! No idea what happened there! haha!

When trying to think of a fun project to display for the bella club meeting i belong to with Funkie Munkie Scraps, i immediately thought of Butterflyabella and using My Time Made Easy's All A Flutter template!
I mean the 2 just go hand in hand together so well!!!


First i used my SCAL to cut out the All A Flutter template. Perhaps i should have scaled it down a weeeeeee bit. Bella looks a smidgen small haha. You'd think i had used the mini butterflyabella that comes with her, but no. I just made the All A Flutter box THAT big! I love the option of making things so large though when i can use a 12x12 mat instead of just printing on 8.5 x11 paper. ;)

What do i love about this template? Well a lot of things really! The cost, a mere 5 dollars.
Cuteness factor - way high. Easy to put together. But one of the best things... the easy to put together and cutness factor work with each other in a way that it's a no brainer! Not sure that makes sense, but what i mean is, you can gussy it up to the high heavens, and it's definitely amazing, but you can also stick to it's basics and it's still a super d duper cute project. Which means if you are using it for a gift, it can be quick and easy with minimal products making it a great packaging and then YOU look good, but it really was a sinch. This is kinda a must when you are a busy crafter! People expect your handmade gifts, and sometimes, you just dont have the time to make them! So viola - the All A Flutter Box is just perfect!


For this project, i've decided to fill it with some cards (as you will see above. Depending on where you choose to position your base or basket like compartment of the template, you can either make your cards very visible or tucked away nicely inside. The choice is up to you!

Here is a closeup of Ms Butterflyabella...

I have simply stamped out the image, colored is and then roughly cut around it before adhering it directly to the All A Flutter box.

Here is a close up of the cards i've made to go inside the butterfly...


It is a very simple card layout, but they were made entirely from scraps from when i put the All A Flutter butterfly together. My first card even had the cardbase out of the scraps! :) You gotta love that! The sentiment is also from stamping bella.


Stamps:
Butterflyabella from StampingBella
sentiment from StampingBella

Tools
Sure Cuts a Lot
Cricut Expression

Paper
Patterned Paper: Bo Bunny
Cardstock: Bazzill (ruby slipper)

Accessories:
Cat's Eye Chalk Inks (warm red, prussian blue)
Kaisercraft Bling (clear)

Read more...

In loving Memory of Baylee Rose Tadlock

>> Monday, January 18, 2010


I count myself as very fortunate in a great many aspects of my life. I might say that i have the worst "stupid luck" on the planet. But i call it "stupid luck" because it means the item always goes on sale after i buy it full price, or when i think it's a good idea to squeeze just a little harder on the glue bottle to get something to come out it explodes. This is my life. Full of those little pesky things. But those little things... those annoying little buggers that happen to me... these are all a part of my very fortunate life. So i'll take them.

I have a wonderful and healthy family. I am able to stay at home with my young children. I have a husband who loves me and a family who supports everything that I do. There are many that are not as fortunate as I am. They lose loved ones far too soon. The struggle financially in a realm that is hard to even comprehend. They deal with illness, and struggles for life.

This is why charity is very important to me. God has given me a truly blessed life. It is my JOB to give back what he has so richly blessed upon me. With the start of my stamp company nearly 1 year ago, I've found one small way that I can give back. Charity stamps are a way that I can help many help just 1 (or a family).

When i was approached by 2 friends of mine in this wonderful crafting world we "live" in... my immediate thought was of course! How can i help! My friends Ashley Newell and Carole Chesser knew Sonda Tadlock. A papercrafter like you and I who's daughter Baylee had been diagnosed at 9 months with Leigh's Syndrome. As Baylee was in her final stages of life, Ashley and Carole wanted to help the family and asked if I would be interested in assisting them with this mission. I spoke with Diem who created this wonderful image so perfectly off of just a few photos of Baylee. Diem's ability to understand exactly what I'm looking for will never cease to amaze me. Perhaps thats what happens when 2 people just click from the get go. :)

Here is the image Diem created...


And here is a card i made using this sweet image. I paired it with a sentiment from the Dream Big set from Paper Makeup Stamps. Baylee loved disney, so i thought that this would be just perfect to pair with her image.


Since my internet has been less than kind to me today, I am going to quickly post a few detail shots. I'm sorry that i dont have marker numbers to provide today. I colored this image the day i received it from Diem and forgot to write down the colors used!

I've tried the trick of adding texture to patterned paper. Here i decided to "de-boss" the image. I've just put the patterned paper upside down in the cuttlebug folder. It gives a softer and less pronounced texture to the card.

Here is a detail coloring shot...

Please go to the PMS blog to see other creations using this image.

You can purchase this image HERE


Read more...

Makeup 4 the weekend Challenge

>> Friday, January 15, 2010


Ok, can I just say that i am TI_RED! I'm typing up this post at near 1 am because i didnt make my challenge card until AFTER the PMS release party! What was i thinking?!

This week's Makeup Artist Challenger was Tina Hale! Now i know i dont always get the chance to participate in the makeup 4 the weekend challenges, but her challenge was to make anything birthday because her birthday is coming up in just a few days!!!!

(by the way, tina is the sweetest thing over, i got the sweetest gift from her today in the mail! i'll post it in a coupla days when i get a picture of it!)

SO not only did i want to make a card in honor of sweet tina's birthday... but we just released so many fun birthday images and sentiments last night... how could i resist playing?!

Here is my card using Bobo the Clown Fairy!


Ok, i'll be honest here... i had NO idea where i was going with this layout? Other than the fact that i was too tired to get up and was using random scraps of paper (hence the circle with the scallop that had been cut out of it! HAHAHAHAHAHA!
But once it all started to come together i thought it was kinda fun!

I also decided to play a little with my copics and color in a way that is entirely not the way i color. Um, i think i'll go back to my standard way, but it was fun to go outside of the box for a little bit. :)

Here are some detail shots for you...


I also for i think the first time ever, did the inside of my card! Not just stamped the inside, i've done that silly! But i actually layered some paper, made it match the front sort of thing. Also using random scraps, but hey, that seemed to be the route i took for the front, so whatever!


and now for....


Stamps: Paper Makeup Stamps
Coloring with copics
Colors Used in balloons: R20, B00, B12, V12, G24, Y18, YR12, BG13, R24
Clown Colors: R24, R27, B00, B12, B14, Y15, YR04, G12

Papers:
All random (and i do mean random) scraps!

Tools and Accessories
Cuttlebug folders swiss dot and circles and spots
Pumpkin Pie ribbon from SU
Bling from Studio G

Thanks for stopping by today!

Dont forget to check out the PMS blog for more details about this challenge and to link up your card. If you are able to play along and upload to a public gallery, please use the tags Paper Makeup Stamps, and M4TW12

Also check out my fellow Makeup Artists to see their challenge cards...

Read more...

Ding a Ling we have a winner!

Quick post to announce my random stamp winner for this past week!

Random.org picked out daisey1977 with her comment from January 11th's post...

daisey1977, Monday, January 11, 2010

Oh my gosh!! I absolutely love this! I would have never thought about altering the colors like that. So glad you post the deets so I can try this out now. Beautiful!!


SO angie - you let me know which PMS stamp you want! :)

Read more...

Paper Makeup Stamps Blog Hop with a My Time Made Easy template!

>> Thursday, January 14, 2010


Ok, that blog post couldnt be longer if i wanted it to be!

Today is THE day! The day of the January release of Paper Makeup Stamps!
And with every release day, the Makeup Artists bring you a blog hop!
Now if you are just a follower of my blog, you'll need to start from the beginning.
Go to the PMS Blog to start your hop and to learn about getting your CODE for a 15% discount off the new releases!

If you've been hoping along from the get go, then you should have arrived from Amber's blog.

And before i forget, because i've done it before...

My letter for you is...
V


I am *in love* with this release! Truly, i am! I know i'm in love with every release, but i really do love this one quite a bit! haha!

For my hop card, i'm showing you Moody in Love, designed by Cynthia Liu.
This moody is so sweet and not quite as detailed as some of the other moody girls. If you love the moody's but have been afraid to try them out, here's a great one to start with!


I decided to pair my Moody Girl with a template called Cutesy Cover from My Time Made Easy.
And you're not going to believe this, but this template is FREE! Thats right, it's a freebie curteosy of MTME's owner (and my friend!) Lauren Meader. This template is a great way to test out one of the MTME templates and see how they work! Even better if you have a cutting program (like sure cuts a lot) so you can see how the MTME templates work with your cutter.
If you dont have a cutter, this template of course is still available as a PDF file as well.

Here's a close up shot of Ms Moody.... details of copics used will follow below :)


I love all the hearts nestled within her hair! And i can almost see the wind of love blowing over her!

For the hexagon shape, I used the geometric shape custom cutter from Creative Memories.


Did you notice the "patterned paper"? I stamped it! I've been very into stamping the background lately! Here I used one of the hearts available from the Hugs and Kisses set. There are 3 hearts in this set, and I used the other 2 yesterday! So this heart was just BEGGING me to be used today!

Here are just a couple more detail shots...
I used an edge distresser along the fold over flap edge as well as along the cover papers.
I also used my crazy sewing machine once again. When it started acting up i decided to just cover over it a few times. Oh i mean, i meant to make it look that way. haha!
For a faux button closure (it actually does securely close underneath using some circle pieces of velcro. I threaded my button using DMC floss and then adhered that to the button and then the adhered it to the front.


Now it's time for you to hop along to Christi Snow's blog!

Hope to see you tonight at the party!


Stamps: Paper Makeup Stamps
Moody for Love
Hugs & Kisses

Coloring with Copics
Skin: E00, E21, R20
Hair: "E23 custom color", E25, E37
Hearts: R00, R11, R30, R20, R21, R32
Eyes G12, G14

Paper:
Green is Katydid by Bazzill, Pink is Sweet Blush from PTI, White is Solar White by Neenah, darker pink is Berry Sorbet by PTI

Tools and Accesories
Sure Cuts A Lot, Cricut Expression
Custom Cutting System in gemstones by Creative Memories
Saddlestitched grosgrain ribbon in Berry Sorbet by PTI
Flower from The Paper Studio
Button from Creative Cafe
Thread/Floss by DMC
Sewing Machine

Read more...

When Love is not Madness... a PMS sneak peek

>> Wednesday, January 13, 2010


Ahhhh, i love that quote! It's one of my favorites! That is why i couldnt wait to work on this sneak peek for you today! I am also particularly in love with some of the new fonts i've purchased to use with stamps! You'll see more new fonts in the future as well.

I truly had fun (like reckless abandon fun!) making this card. Granted, i wasnt paying close enough attention to my kiddos apparently and my 3 year old some how managed to rip his closet bar out of the drywall. He said he wanted to see the view. No more wonderpets for you!

Ok, back to my happy place!

I used the Monday Mojo Madness sketch (man, i love those sketches!)


For my card i busted out a few of those techniques i've been forgetting about. My friend and fellow team member, Lisa, reminded me lately, that heat embossing can give the perfect touch. I have so much embossing powder its redonculous! All sorts of colors. but yet, i rarely get it out. Well, i wanted the AWESOME love heart to really pop out (that stamp is from the Hugs and Kisses set to be released as well!). The red embossing powder on top of the chocolate paper was perfectly what i wanted! Now let me say, i remember well my hunt for the perfect red embossing powder! All the ones i tried werent actually opaque and disappeared on dark cardstock. Well, clearly, this isn't the case here! This is Top Boss (by clearsnap) embossing powder in red. :)

Here is a detail shot so you can really see the embossing in action! The little teeny hearts on my card were created using a versamark marker. I just drew little teeny hearts. haha.


Lately, I've been very into layers and texture on cards. I'm still exploring (and reminding) myself to play more with texture. So far i seem to be letting the layers add the texture. haha.

But this was a fun little trick. I cut my red strip, and realized i cut too wide of a strip. So i trimmed off a piece. And then i thought, you know, that would be kinda fun layered on top!
SO i glued the red strip on top of the red. Its not one of those jump out at you details. but thats why i like it. :)

I also heat embossed another heart from the Hugs and Kisses set and then cut it out (using an exacto knife) and adhered it to the top of the same colored cardstock as it was stamped on. Again, it makes it pop up just a smidge, but not so much as to steal focus.

There are other little details in this card. it was sort of a labor of love. but adding in those details, whether they are noticed or not are really what has been making cardmaking fun for me lately. It's those little details, the ones that might be missed, that remind me that i'm making my cards for my own enjoyment. Not because i have to. not because someone is expecting a card. But just because it's something i enjoy. The little details make it. :)


So thats my peek for you today! Be sure to head on over to the PMS blog to see the other fun wordart being released tomorrow, leave a comment and be entered to win the whole release! But dont forget, there are some hidden free stamps on the design teams blogs. You just gotta leave some comments to find them!

Be sure to check back in tomorrow for our super fun PMS BLOG HOP!

Read more...

PMS sneak peek day 2 combo with Just Us Girls!

>> Tuesday, January 12, 2010


I love birthdays! I've always loved birthdays! It's really a shame since my husband cares so little about them that he actually FORGOT mine this past year. I'm still not going to let him live that down. Maybe i should remind him of that since i'm trying to take over his office. Anyhoo-

I love birthdays! I love my own birthday. I love other peoples birthdays. Its just plain fun to have a day of your own, ya know?! Well, for those of you coming over here from the PMS blog, you might already know that Paper Makeup Stamps is having a birthday very very soon!!! February 2nd to be exact! I cant believe my little stamp company is going to be turning 1!!! it seems like only yesterday it was just this little dream of fun=ness and now it's a fully functioning company complete with a FIERCE design team! All i can say is WOW!

We are going to celebrate the PMS birthday with all kinds of fun, but i'll just let you know now to mark your calendars and will save the details til later! :)

But today i have a sweet birthday card to share. Bonus... one of Jack's little girlfriends is having a birthday party soon and we just got the invite. Gotta love it when you can double whammy your work with your play!

This card uses Ally... one of the soon to be released stamps from PMS. Quick fun story about her name... you may (or may not) know that Jack helps to name many of the fairies. So long as he doesnt come up with a goofy name, or a name we've already used, i go with it. He definitely named Ally! He took one look at her and said... "OOOOOH! Allllllllly" (imagine a 3 year old sounding totally in love). And I said, Oh? ok then! And he said, "she has beautiful hair like allly at school!" I did know he had an Ally in his class. I did NOT know he had such a crush on her! haha!

So here's Ally, having her tea party. The sentiment comes from a great birthday sentiment set called Birthday Cheer that Shaela put together. You are going to LOVE this set!

Here is my card...


I just love this fairy image! I think she is one of my favorites so far! Truly! I know thats a tough call when there are so many new ones released, but i really love her. She's just so sweet!

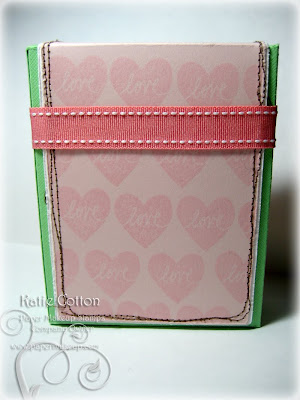
Now for a little inspiration on my card, I decided to play along with this weeks JUGS challenge which was a technique challenge to sew on your card. let me tell you, my sewing machine does not like me. not one bit. I can not figure out the tension for the life of me! If you could see the bobbin thread on the underside of my paper... it's a mess! It makes it incredibly hard to actually sew a project, like a real one with fabric! haha! My sewing machine did not always have this problem. Would anyone like to enlighten me on how to get it to STOP! *sigh* I've tried the dials umpteen million different ways. No luck. Which is a shame because i love the way sewing looks on cards!

Here are some detail shots...

see the stitching weirdness! Argh! I know it's too tight which is why it's pulling in the corner, but any looser and the mess underneath is just TOO much!
trying to capture that sparkle in her wings! hehe!
I love these flowers! I just got them off of a floral stem at I think ac moore but it might have been hobby lobby. :) The fuzzy brad in the center is from Creative Cafe.


Oh... and one last coloring shot for you... exact colors used will be down in "the deets"


Dont forget to go to the PMS blog to see more sneak peeks of whats to come from Paper Makeup Stamps! You dont want to miss out!


Stamps: Paper Makeup Stamps, sneak peeks, to be released January 14th 8 pm CST
Ally from the Beautiful Day Fairy collection
Birthday Cheer

Coloring with copics
Skin: E00, E21, R20 (cheeks)
Hair: "Y20" custom color (YR31 would be a good substitute), Y21, YR23 (just a smidge for this one)
Blouse: R30, R20, R21
Skirt: "e23 custom color", E25, E37
TeaPot: E21, "E23"
Wings: R000, clear spica pen

Paper:
Patterned Paper: Pink designs from Martha Stewart (get the pad from walmart, 8 bucks, WOOT!), Brown design by Bo Bunny
Cardstock: Berry Sorbet (PTI), Brown (i totally forget the actual name) from Creative Memories, Solar White Classic Crest (Neenah)

Tools and Accessories
SpellBinders Nestabilities: Standard Long Rectangle (small), Scalloped Long Rectangle (small), Standard Circle (large), Scalloped Circle (large)
Flower off of floral stem (ac moore or hobby lobby)
Fuzzy Brad by Creative Cafe (creative imaginations)
Sewing Machine
Cat's Eye Chalk Ink n creamy brown


Read more...
Related Posts with Thumbnails

Top Blog Sites

Blog Archive

Listen to makeupartistkaties playlist


Get a playlist! Standalone player Get Ringtones

  © Blogger template Webnolia by Ourblogtemplates.com 2009

Back to TOP