Stamping on Candles
>> Wednesday, January 2, 2008

This super easy technique makes quick and stunning gifts and the possibilities are endless! Here's what you need...
* Stamp(s) of choice
* Ink pads of choice (if coloring in, use a good black ink, i prefer versafine in black onyx)
* Markers (optional)
* Tissue Paper (just the gift wrap kind)
* Wax Paper
* Heat Tool
* White or Ivory candle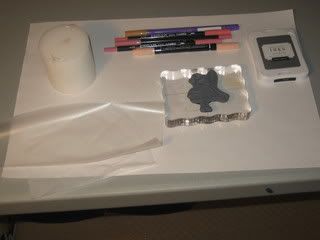
Your first step is to stamp your image onto the tissue paper. It is important to have a scatch sheet of paper underneath your tissue paper as color will bleed thru to your work surface.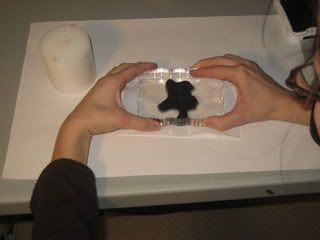
Next you will add any additional coloring to your stamp (if desired). I will note that the stamp i used is Causabella and you can pruchase this stamp at www.stampingbella.com
Now trim out your stamped design (it does not have to be perfect or right on the image, just be sure that your tissue paper is not larger than your candle).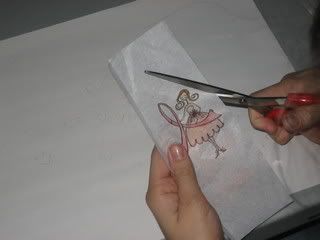
Lay your cut image on your candle.
Cover the entire candle with wax paper and pull tight. You do not want air bubbles in your design.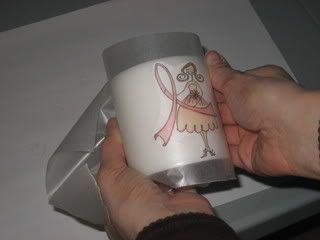
Heat covered candle with your heat tool. I recommend moving your heat tool in circular motions as to not overheat any one spot. You will see your tissue paper start to "disappear" into your candle.
Peel off your wax paper and Viola! Your stamped candle!
In an alternate version... you can cover your whole candle using a strip of tissue paper. Be sure than your strip is not wider than your candle.
Stamp all over your tissue strip. Layering colors looks very nice...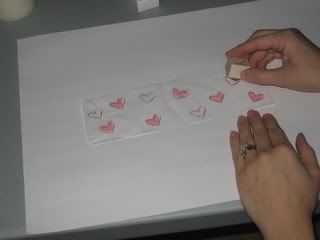
Wrap entire strip around candle.
You will have to heat the candle in sections. Be very sure that your tissue paper and wax paper remain flat against your candle otherwise wax will pool on your candle giving a lumpy appearance after you peel off your wax paper. (stamps used for this candle are by Stampin Up!)
If you complete this class i'd love you to share your finished creations! Please post the link to your candle in the comments section of post!
* added note * it was brought to my attention that credit was not given where credit was due. I learned this technique from my friend, Rachel. She showed me how super easy it was one day at her house. I decided to make a tutorial to show some of the gals in a online swap group i am in. I did not create this technique on my own. And in fact, I believe my friend learned of this technique off of Splitcoaststampers.com (which is a fabulous site for techniques and tutorials by the way!). Unfortunately, i do not know who the original creator of this is, but whoever they are, they ROCK!








7 comments:
I love both of these and thanks for sharing. I just joined the bella yahoo group and I am so glad I did and was directed to your blog.
Happy New Year!
Debbie M. - Mesa , AZ
You gave a wonderful tutorial! This is on my list to do this year!!!
Cute candles sistah! I've bought candles but haven't been brave enough to try this technique yet. Maybe now I will!
Very cute! Thanks for sharing!
Ya Know. Most crafters give credit to the source website instead of recreating its content as your own.
cindy c
just a note that i have amended my blog to note that i learned this technique from a friend of mine. I never thought to mention where she learned it from though i did know that she learned it online. She learned the technique from Splitcoast Stampers. Which in my opinion is the best site for learning techniques!
YOU ARE AWESOME ... i have always wanted to learn to do this ... i am off to home to find my candles and rest of the supplies!
THANKS THANKS THANKS
Post a Comment